Forget the outdated saying “money doesn’t grow on trees” – in the world of creative gift-giving, it absolutely can! Enter the Money Tree, a fun, crafty, and surprisingly impressive way to present cash as a gift. Perfect for those hard-to-buy-for individuals or anyone who appreciates a blend of handmade charm and practical presents, a DIY money tree is a guaranteed win. It’s crafty enough to show you care, yet ultimately, it’s a delightful bundle of cash – the best of both worlds!
 gift idea money topiary
This guide will walk you through each step to create your own money tree topiary. It’s easier than you might think, and the result is a memorable and much-appreciated gift.
Materials You’ll Need to Grow Your Money Tree
Before you start crafting your денежное дерево (money tree in Russian, for a touch of international flair!), gather these supplies:
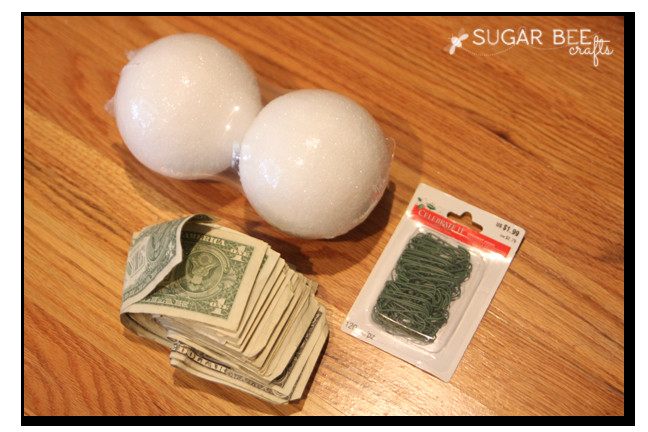
- Styrofoam Balls: You’ll need two – one medium-sized for the topiary “head” and a smaller one to anchor the tree in the pot. (e.g., a 4-inch and a 2-inch ball).
- Wire: Flexible wire is essential for shaping the money “leaves.” Ornament hooks in green are ideal as they blend in and are pre-cut to a good length, but any thin, pliable wire will work.
- Cash: The star of the show! Dollar bills work wonderfully. The amount is up to you; around $35 in single dollar bills creates a nicely full tree, as seen in this example.
- Clay Pot: Choose a pot that complements your style. Chalkboard paint can add a customizable touch, allowing you to write a personal message.
- Dowel Rod or Stick: This will be the trunk of your money tree. A wooden dowel rod or even a sturdy stick from your yard will do the trick.
- Decorative Elements (Optional): Ribbon, burlap, paint, and any other embellishments to personalize your pot and tree base.
- Scissors: For trimming wire if needed.
 money topiary tree gift
Step-by-Step Guide: Crafting Your DIY Money Tree
Let’s get crafting and turn those dollar bills into a stunning money tree!
1. Prepare Your Money “Leaves”
This is where the magic begins. You’ll be transforming ordinary dollar bills into decorative elements for your money tree.
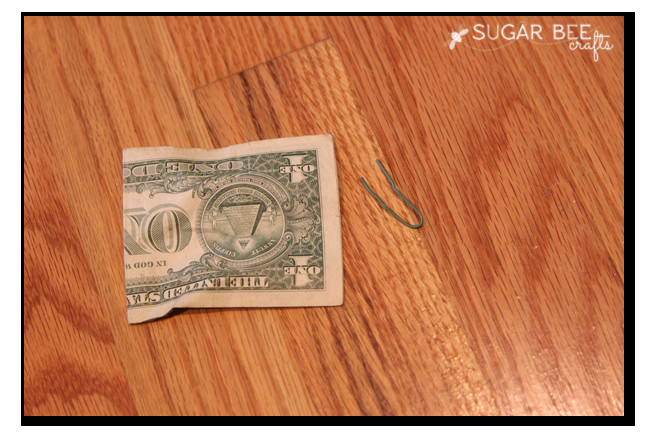
- Fold the Bills: Take a dollar bill and fold it in half lengthwise.
- Fold the Wire: Fold a piece of wire (or ornament hook) in half as well.
 1313 copy
2. Create the Money “Flowers”
Now, shape the folded bill and wire into your money “flowers.”
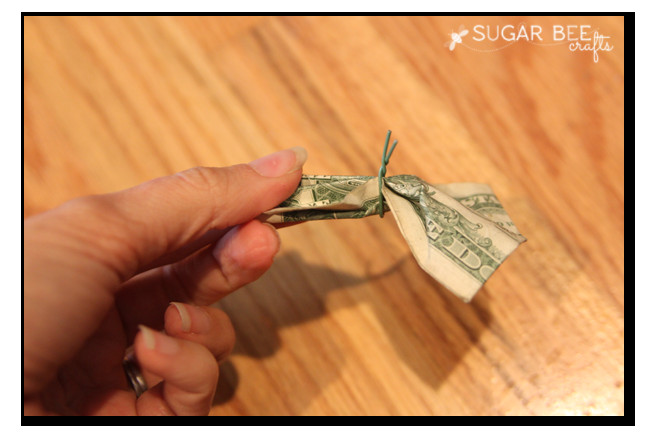
- Pinch and Gather: Pinch the folded dollar bill in the center and gather it together, creating a bow-like shape.
- Wrap with Wire: Place the folded wire around the gathered center of the bill.
- Twist to Secure: Twist the wire firmly to hold the folded bill in this “flower” shape. This twisted end will also serve as the stem to attach to the styrofoam ball.
 1314 copy
 1315 copy
3. Assemble the Topiary Ball
Time to bring your money flowers together to form the top of your money tree.
- Poke and Insert: Take one of your money flowers and poke the twisted wire end into the medium-sized styrofoam ball.
- Repeat and Fill: Continue making money flowers and inserting them into the styrofoam ball. Space them out evenly to cover the entire ball. The more “flowers” you add, the fuller your money tree will be. For a lush look, aim to minimize gaps between the bills.
 1316 copy
Alt text: Instruction image showing how to insert a money flower into a styrofoam ball to start assembling the money tree topiary.
Alt text: Image demonstrating the process of filling the styrofoam ball with money flowers to create the head of the DIY money tree.
 diy money ball craft
4. Create the Base and Trunk
Now, let’s build the base and trunk to support your money tree topiary.
- Prepare the Pot: If you’re painting your clay pot, do so now and let it dry. Decorate it as desired with ribbon, burlap, or other embellishments.
- Insert Small Styrofoam Ball: Place the smaller styrofoam ball into the clay pot. This will act as an anchor for the trunk.
- Attach the Trunk: Push one end of your dowel rod or stick into the styrofoam ball in the pot. Then, carefully push the other end of the dowel rod into the money-covered styrofoam ball. Be careful not to push it all the way through the topiary ball.
Alt text: Step-by-step instructions for assembling the money tree, showing how to insert the trunk into the base and attach the money ball top.
5. Finishing Touches and Decoration
Your money tree is almost complete! Add the final touches to make it gift-ready.
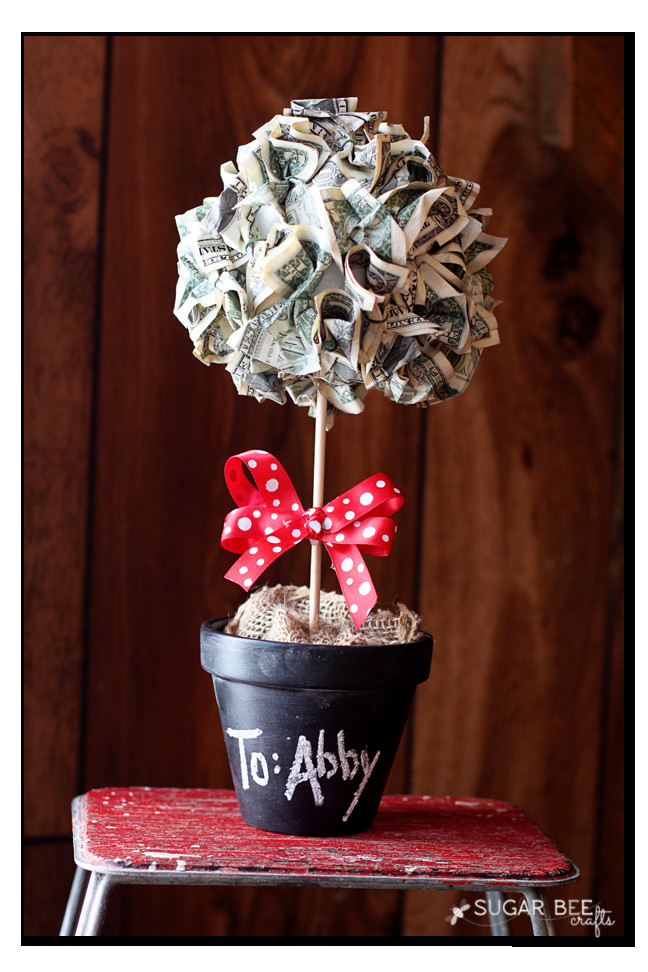
- Conceal the Base: Cover the styrofoam in the pot with burlap, moss, or any decorative material to hide it and create a polished look.
- Add a Bow: Tie a ribbon around the trunk of the tree, just below the money ball, for an extra decorative element.
- Personalize: Consider adding a tag with a message or the recipient’s name to personalize your unique money tree gift.
 money topiary gift idea
Your Money Tree is Ready to Bloom!
Congratulations! You’ve successfully created a money tree – a gift that’s both visually appealing and incredibly practical. This денежное дерево is perfect for birthdays, graduations, holidays, or just because. It’s a unique and memorable way to give the gift of money, showing both your craftiness and generosity. Get ready to watch your thoughtful gift bloom with appreciation!