Graduation season is upon us, and finding the perfect gift to celebrate your graduate’s achievement can be a delightful challenge. While gift cards and checks are always appreciated, why not elevate your gifting game with something unique, personal, and visually stunning? Enter the Money Lei Graduation gift – a creative and fun way to present cash that any graduate will love.
Inspired by the Hawaiian tradition of lei giving, a money lei transforms ordinary dollar bills into a beautiful and wearable garland. It’s not just a gift of money; it’s a symbol of celebration, good luck, and a tangible representation of your pride in their accomplishment. Plus, let’s be honest, a money lei is far more exciting to receive and display than a simple card!
This tutorial will guide you through creating your own impressive money lei graduation gift. It’s easier than you might think, and the result is a memorable and much-appreciated present. For a fantastic gift that’s both fun to make and exciting to receive, let’s dive into the steps of crafting a money lei graduation masterpiece!
Supplies You’ll Need to Make a Money Lei
Before you begin, gather these simple supplies. You might already have many of these items at home!
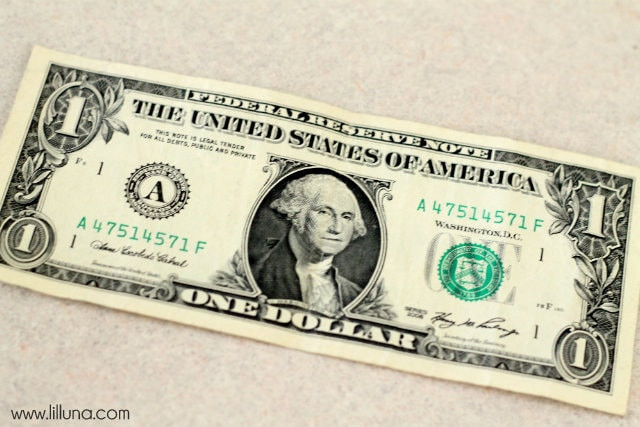
- 30-35 Crisp $1 Bills: The fresher and crisper the bills, the easier they are to fold and the better your lei will look. You can adjust the amount depending on how full you want your lei to be.
- Colored Paper: Choose paper in your graduate’s school colors or any festive color. Regular printing paper works perfectly.
- Elmer’s Glue Spots or Double-Sided Tape: These are ideal for adhering the folds temporarily without damaging the bills. Glue spots are recommended as they are strong yet removable.
- Hot Glue Gun & Glue Sticks: For quickly securing the paper pieces. Be careful when using hot glue.
- Ribbon: Select a ribbon that complements your paper color. Satin or grosgrain ribbon works well and adds a nice finishing touch.
 Close-up of supplies needed to make a money lei including dollar bills, colored paper, glue spots, hot glue gun, and ribbon.
Step-by-Step Guide to Creating a Money Lei for Graduation
Follow these simple steps to assemble your money lei graduation gift. It might take a little time, but the process is straightforward, and the final product is well worth the effort.
Step 1: Prepare Your Dollar Bills
Start by neatly stacking your dollar bills. You’ll be accordion-folding each bill to create a decorative element for your lei.
 Step 1: A hand demonstrating how to start accordion folding a dollar bill for a money lei.
Step 2: Accordion Fold the Bills
To accordion fold, begin by making a zig-zag fold across the dollar bill. A helpful tip is to start your first fold roughly halfway between the left edge and the number “1” on the President’s side of the bill. This tends to create even folds. Continue folding in an accordion style until you reach the end of the bill.
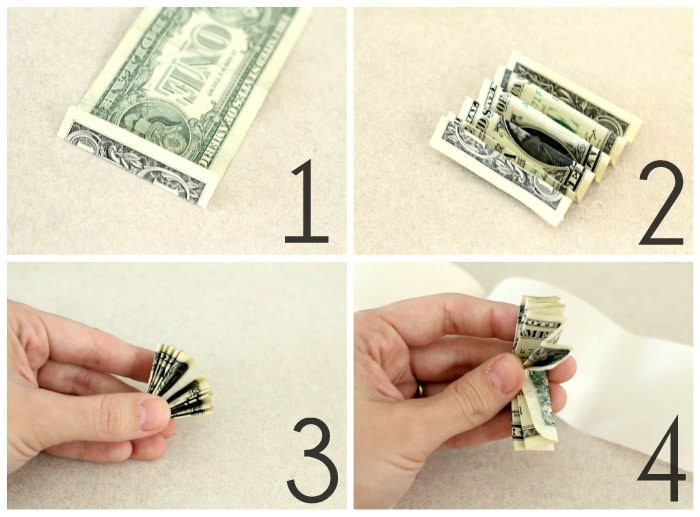 Step 2: Close-up showing the accordion fold of a dollar bill for a money lei, with fingers pinching the center.
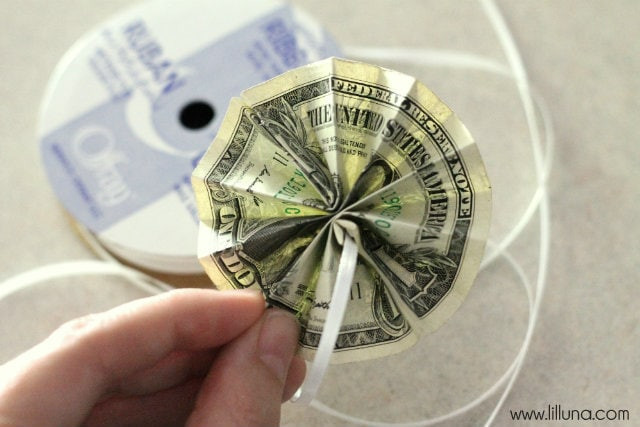
Once folded, fold the accordion-folded bill in half to find the center crease. Apply glue spots or small pieces of double-sided tape to the inside folds on each side of the center crease. Press the sides together to secure the fan shape. Repeat this process for all dollar bills. Remember not to place glue too close to the center crease, as this is where the ribbon will pass through.
Step 3: Prepare Paper Pieces
Cut your colored paper into rectangles approximately the same size as a dollar bill. You will need about 30-35 paper pieces, just like the number of dollar bills. Accordion fold these paper rectangles in the same manner as you folded the dollar bills, and then fold them in half. Secure these paper pieces with hot glue instead of glue spots for a quicker hold. Again, avoid gluing too close to the center crease.
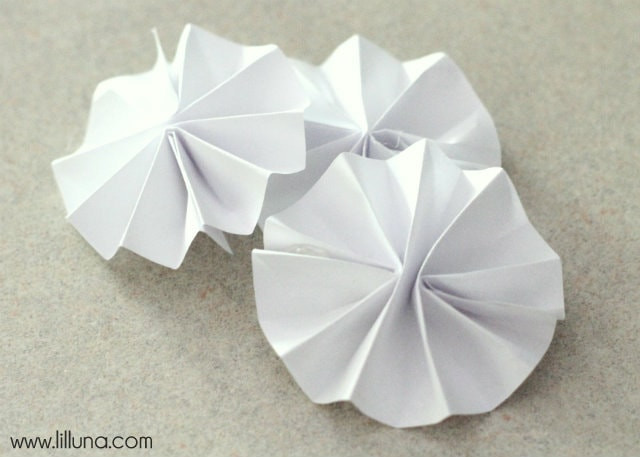 Step 3: Accordion-folded paper pieces in various colors, prepared for the money lei.
Step 4: String the Lei Together
Now it’s time to assemble your money lei graduation. Cut a length of ribbon long enough to comfortably fit around the graduate’s neck, leaving extra length for tying. Begin stringing the accordion-folded dollars and paper pieces onto the ribbon, alternating between a dollar bill and a paper piece. Thread the ribbon through the center crease of each folded piece.
 Step 4: Hands stringing together alternating dollar bill fans and paper fans onto a ribbon to create the money lei.
Continue stringing until you have used all your folded bills and paper pieces. Once you’ve reached your desired length, tie the ends of the ribbon together securely.
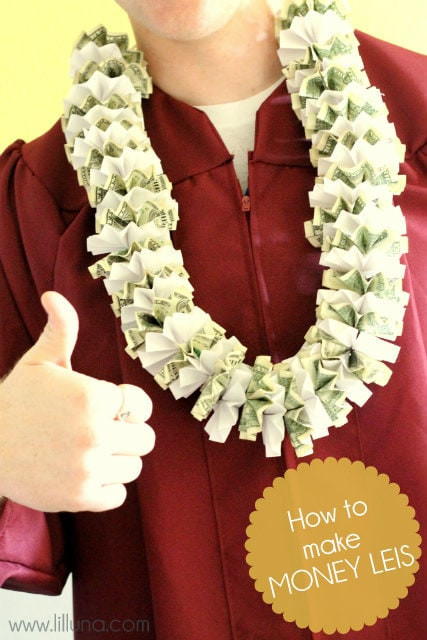
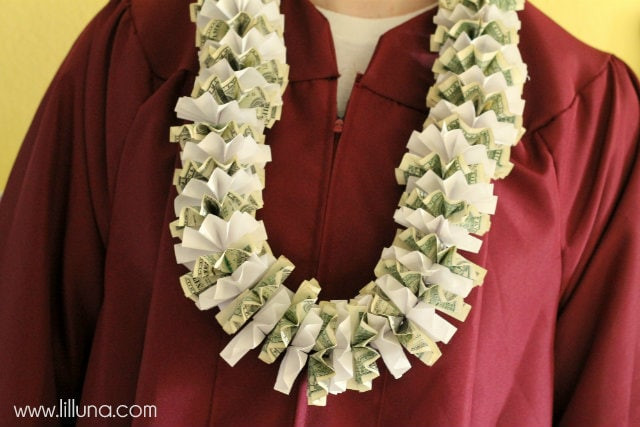 Step 5: A completed money lei graduation gift draped over graduation gown.
Tips and Creative Variations for Your Money Lei
- Increase the Cash Value: Use higher denominations of bills ($5, $10, or $20) to increase the monetary gift. Just be mindful of the lei’s overall thickness and weight.
- Incorporate School Colors: Use paper and ribbon in the graduate’s school colors for a personalized touch.
- Add Candies or Small Treats: For an extra festive lei, you can incorporate small, lightweight candies or treats between the money and paper pieces. Consider gold-wrapped candies to maintain a celebratory color scheme.
- Personalized Ribbon: Use a ribbon with a graduation theme or personalize it with the graduate’s name and graduation year.
- Vary the Length: Adjust the length of the lei based on preference. A shorter lei can be just as impactful.
- Consider a “Money Necklace”: For a shorter version, create a “money necklace” using fewer bills and paper pieces.
Conclusion: Celebrate Graduation with a DIY Money Lei
Congratulations! You’ve now created a stunning and unique money lei graduation gift. This DIY project is a thoughtful and fun way to celebrate your graduate’s achievements and give them a gift they’ll truly appreciate. It’s more than just money; it’s a symbol of your pride and best wishes for their future.
So, skip the generic gift card and get crafting! A handmade money lei graduation gift is sure to bring a smile to your graduate’s face and become a cherished keepsake from their special day. Happy crafting and happy graduation season!
For more creative graduation gift ideas and party inspiration, be sure to check out these related posts:
 Mini Cupcake Graduation Caps – a fun and easy dessert for graduation parties.
 Graduation Cap Toppers and Flags – perfect little treats for graduates.
Graduation Cap Toppers and Flags
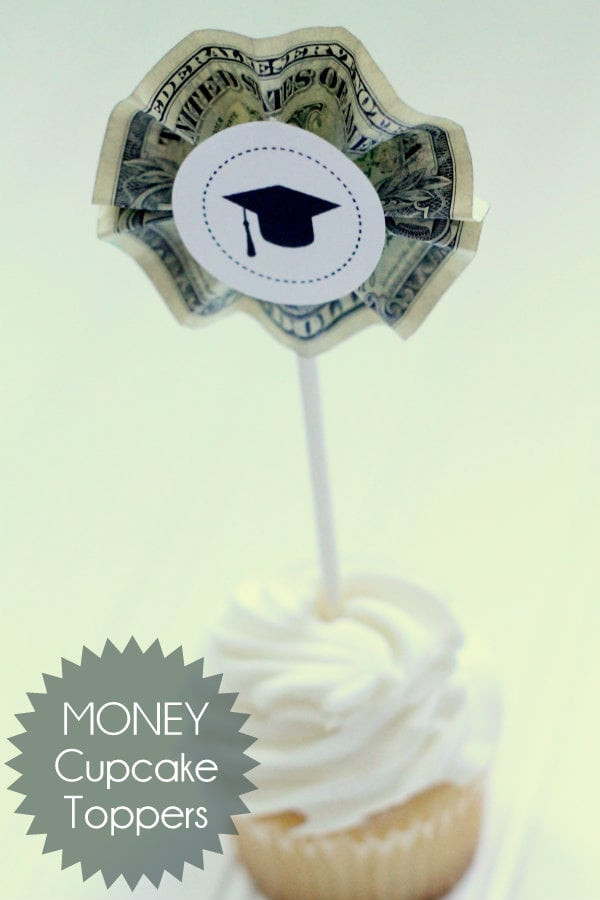 Money Cupcake Toppers – great idea for graduation party decorations.