Making a money necklace is a creative and thoughtful way to give a gift, and at money-central.com, we’re here to show you exactly how to do it. This guide will provide you with all the steps you need to create a personalized and memorable present, while offering tips on budgeting and financial responsibility. Thinking about more ideas for financial gift, perhaps investing for a child’s future? Let’s dive in and create a money necklace that’s both fun and financially savvy.
1. What is a Money Necklace and Why Make One?
A money necklace is a decorative chain or garland made by folding and attaching currency bills, often given as a celebratory gift. It’s more than just cash; it’s a personalized expression of congratulations or affection.
- Celebratory Gift: Money necklaces are ideal for graduations, birthdays, weddings, or any special occasion where giving cash is appropriate.
- Personalized Touch: Unlike a simple cash gift, a money necklace shows creativity and effort, making the recipient feel extra special.
- Customizable: You can tailor the necklace to the recipient’s interests by using specific colors, themes, or folding techniques.
- Fun and Engaging: The process of making a money necklace can be a fun craft project for both the giver and the receiver.
- Practical Gift: It’s a gift of money that the recipient can use as they wish, making it a practical and appreciated present.
According to financial gifting trends, personalized and creative cash gifts like money necklaces are becoming increasingly popular, blending practicality with a personal touch.
2. Who is the Money Necklace Suitable for?
Money necklaces are a versatile gift suitable for a wide range of people and occasions. Here’s a breakdown of who would appreciate a money necklace and why:
- Graduates: High school or college graduates can use the money for education, living expenses, or starting their careers.
- Birthday Celebrants: Perfect for any age, a money necklace adds a fun twist to a traditional cash gift.
- Wedding Celebrations: Newlyweds can use the money for their honeymoon, setting up their home, or other expenses.
- Children and Teenagers: A fun and engaging way to teach kids about money and saving, while also giving them a useful gift.
- Anyone in Need of Financial Assistance: A thoughtful way to provide support during tough times, such as unexpected medical bills or job loss.
- Travel Enthusiasts: The money can go towards their next adventure, making it a practical and exciting gift.
- DIY Lovers: The unique presentation of the money necklace appeals to those who appreciate creative and handmade gifts.
- Friends and Family: A personalized gift that shows you care and put thought into their present.
- Charity Events: Money necklaces can be created and auctioned off to raise funds for a good cause.
- Retirees: Helps them enjoy their retirement or fulfill long-awaited plans.
3. What Materials Do You Need to Make a Money Necklace?
Gathering the right materials is the first step to creating a beautiful and personalized money necklace. Here’s a comprehensive list of what you’ll need:
- Currency Bills:
- Denominations: Choose the denominations based on your budget and the desired thickness of the necklace. Ones, fives, tens, and twenties are common choices.
- Quantity: Determine the number of bills needed based on the desired length of the necklace. Typically, 20-50 bills are used for a standard length.
- Condition: Use crisp, new bills for a polished and professional look. Avoid bills that are overly worn or damaged.
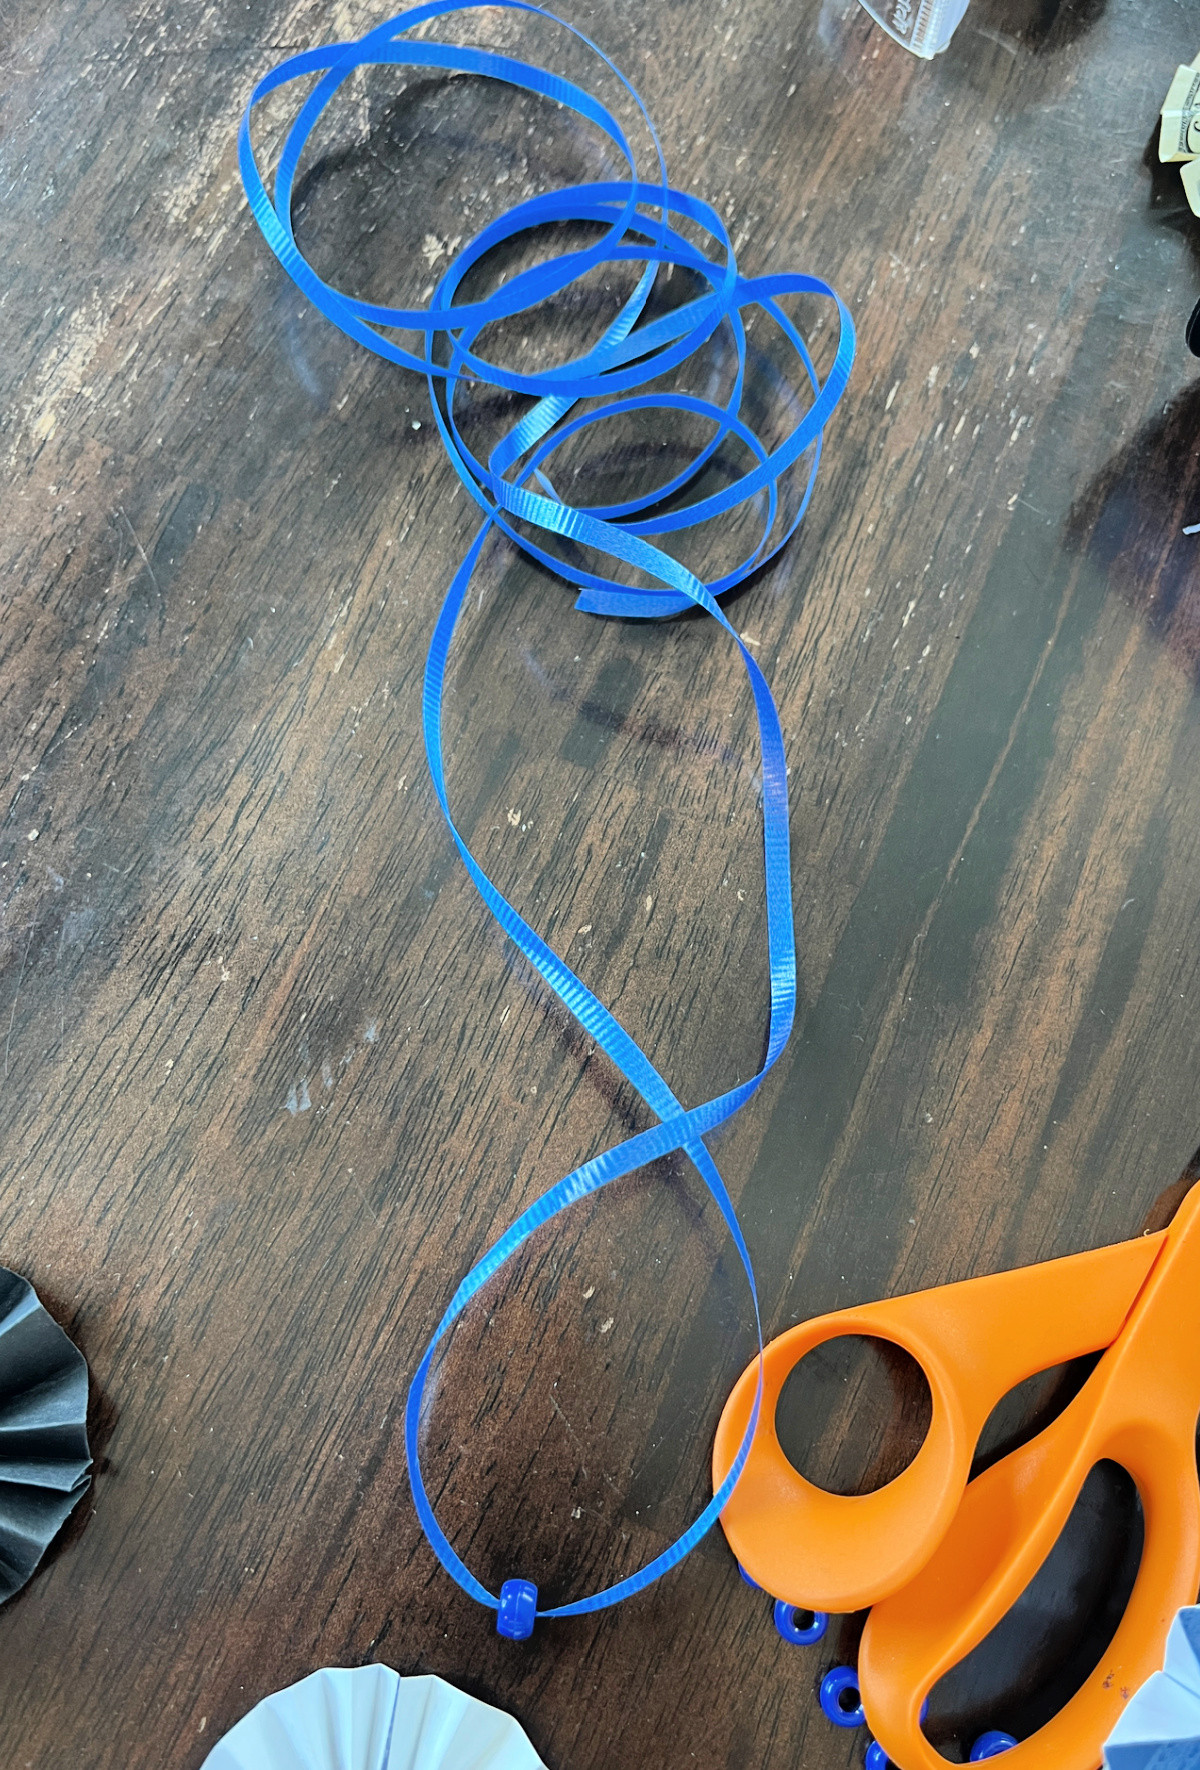
- String or Ribbon:
- Material: Opt for a strong and durable material such as satin ribbon, nylon string, fishing line, or elastic cord.
- Color: Choose a color that complements the bills or matches the occasion. School colors for graduation or wedding colors are great options.
- Length: Measure the string or ribbon to be approximately 6-8 feet long to ensure you have enough length for the necklace and tying it off.
- Decorative Paper (Optional):
- Type: Use patterned or colored paper to add visual interest and customize the necklace. Scrapbook paper, origami paper, or cardstock work well.
- Size: Cut the paper into small rectangles slightly smaller than the currency bills.
- Quantity: Match the number of paper pieces to the number of bills you plan to use.
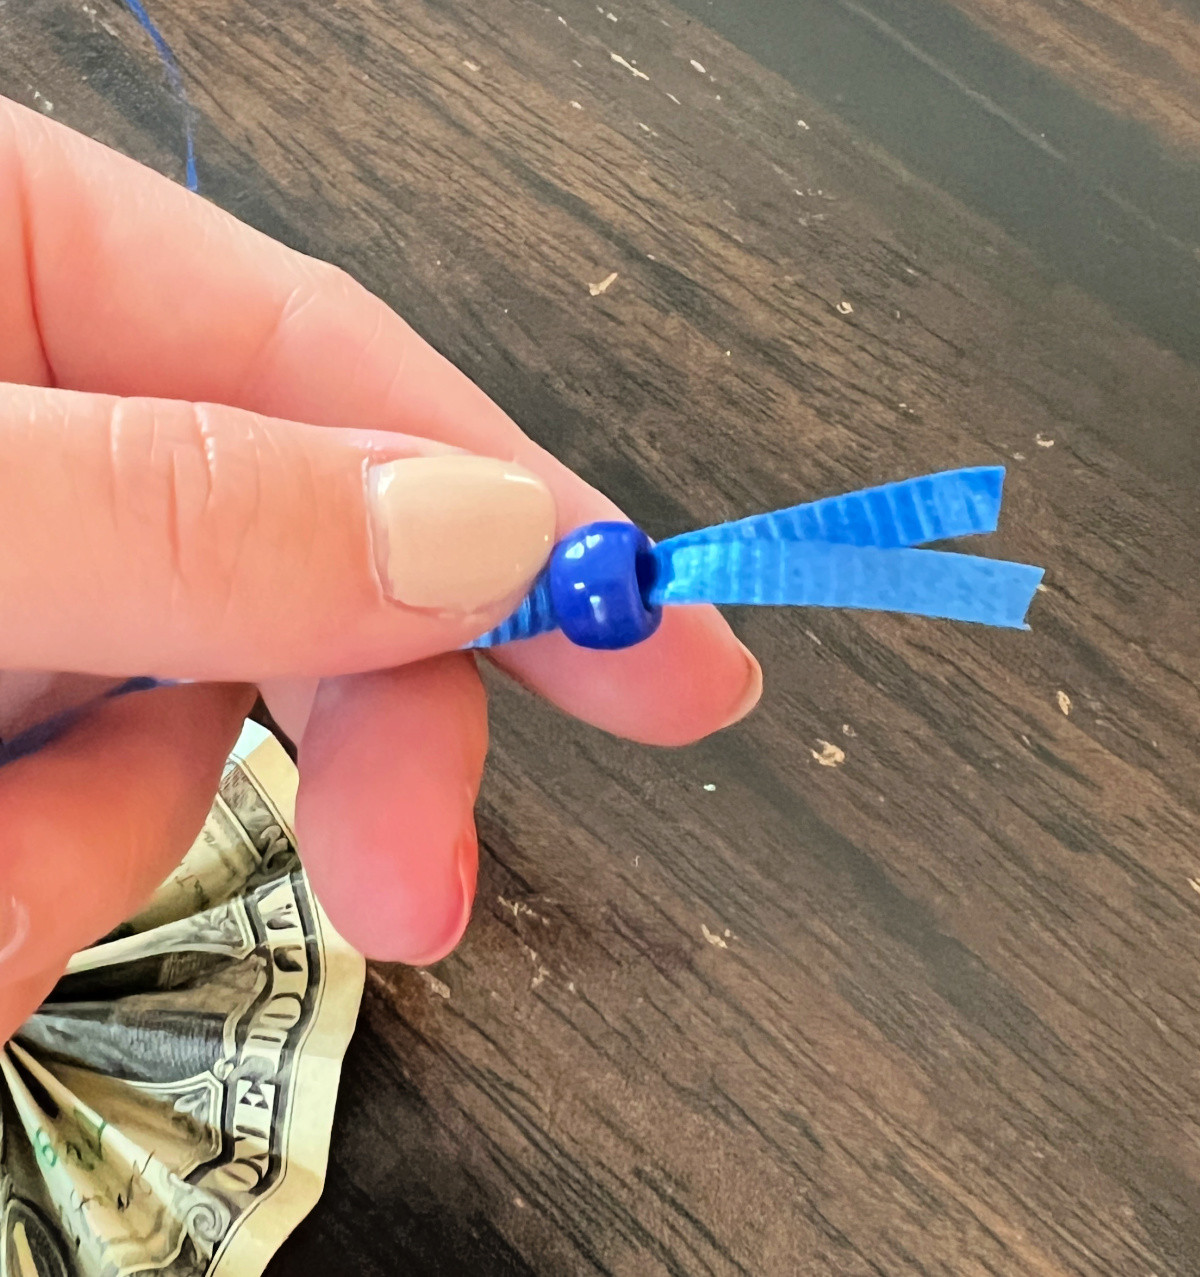
- Beads (Optional):
- Type: Choose beads that match the color scheme or theme of the necklace. Glass beads, plastic beads, or wooden beads are all suitable options.
- Size: Select beads with a hole large enough to easily thread the string or ribbon through.
- Quantity: Determine the number of beads needed based on the desired spacing and design.
- Tape or Glue Dots:
- Type: Use clear tape or glue dots to secure the folded bills without damaging them.
- Adhesive Strength: Ensure the tape or glue dots provide a strong hold but can be easily removed if necessary.
- Scissors:
- Sharpness: Use sharp scissors for precise cutting of paper and string.
- Ruler or Measuring Tape:
- Precision: Use a ruler or measuring tape to accurately measure and cut the paper to the desired size.
- Clips or Clothespins (Optional):
- Purpose: Use clips or clothespins to hold the folded bills in place while the adhesive sets.
By gathering these materials, you’ll be well-prepared to create a personalized and memorable money necklace for any special occasion.
 Materials for making money necklace
4. What Are the Popular Folding Techniques for Money Necklaces?
There are several creative folding techniques you can use to make your money necklace stand out. Here are some popular methods:
4.1. Accordion Fold
This simple fold creates a textured, fan-like appearance.
- Start Folding: Fold the bill in an accordion style, alternating the direction of each fold.
- Continue Folding: Continue until the entire bill is folded.
- Fold in Half: Fold the accordion-folded bill in half.
- Secure Ends: Use a small piece of tape or a glue dot to secure the ends together, creating a fan shape.
4.2. Triangle Fold
This technique adds a geometric element to your necklace.
- Fold in Half: Fold the bill in half lengthwise.
- Open and Fold Corners: Open the bill and fold the top corners towards the center crease.
- Fold Bottom Edges: Fold the bottom edges up to meet the top edges.
- Fold in Half Again: Fold the entire piece in half to create a triangle.
- Secure: Use tape or glue to keep the triangle shape intact.
4.3. Heart Fold
Perfect for romantic occasions, this fold creates a sweet, heartfelt design.
- Fold in Half: Fold the bill in half lengthwise.
- Open and Fold Corners: Open the bill and fold the top corners down to meet the center crease.
- Invert and Curve Top Edges: Invert the bill and gently curve the top edges to form the top of the heart.
- Secure: Use tape or glue to secure the curved edges and maintain the heart shape.
4.4. Butterfly Fold
This elegant fold adds a whimsical touch to your money necklace.
- Fold in Half: Fold the bill in half lengthwise.
- Open and Fold Corners: Open the bill and fold all four corners towards the center crease.
- Fold in Half Again: Fold the entire piece in half again.
- Pinch and Secure: Pinch the center and use tape or glue to secure, creating the butterfly’s body.
- Shape Wings: Gently shape the wings by pulling the top layers apart slightly.
4.5. Shirt Fold
Ideal for graduations or career-related celebrations, this fold creates a miniature shirt.
- Start with Bill Facedown: Place the bill facedown.
- Fold Top Corners: Fold the top corners down to meet the center.
- Fold in Half: Fold the bill in half horizontally.
- Fold Bottom Up: Fold the bottom edge up to create the shirt collar.
- Fold Sides In: Fold the sides in to create sleeves.
- Tuck Under Collar: Tuck the folded sides under the collar to form the shirt.
- Secure: Use tape or glue to hold the shirt shape together.
4.6. Flower Fold
This attractive fold looks just like a flower, which is perfect for any special occasion.
- Start with Bill Facedown: Place the bill facedown.
- Fold All Corners: Fold all four corners in towards the center.
- Fold Corners Again: Fold each of the new corners into the center.
- Flip Over: Flip the entire bill over.
- Fold Corners to Center Again: Fold the corners into the center for a third time.
- Pinch and Pull Out: Pinch the center to hold the folds in place. Gently pull out the paper from underneath each corner to reveal petal shapes.
- Secure: Use tape or glue to secure the flower shape.
By experimenting with these folding techniques, you can create a money necklace that is both visually appealing and personally meaningful.
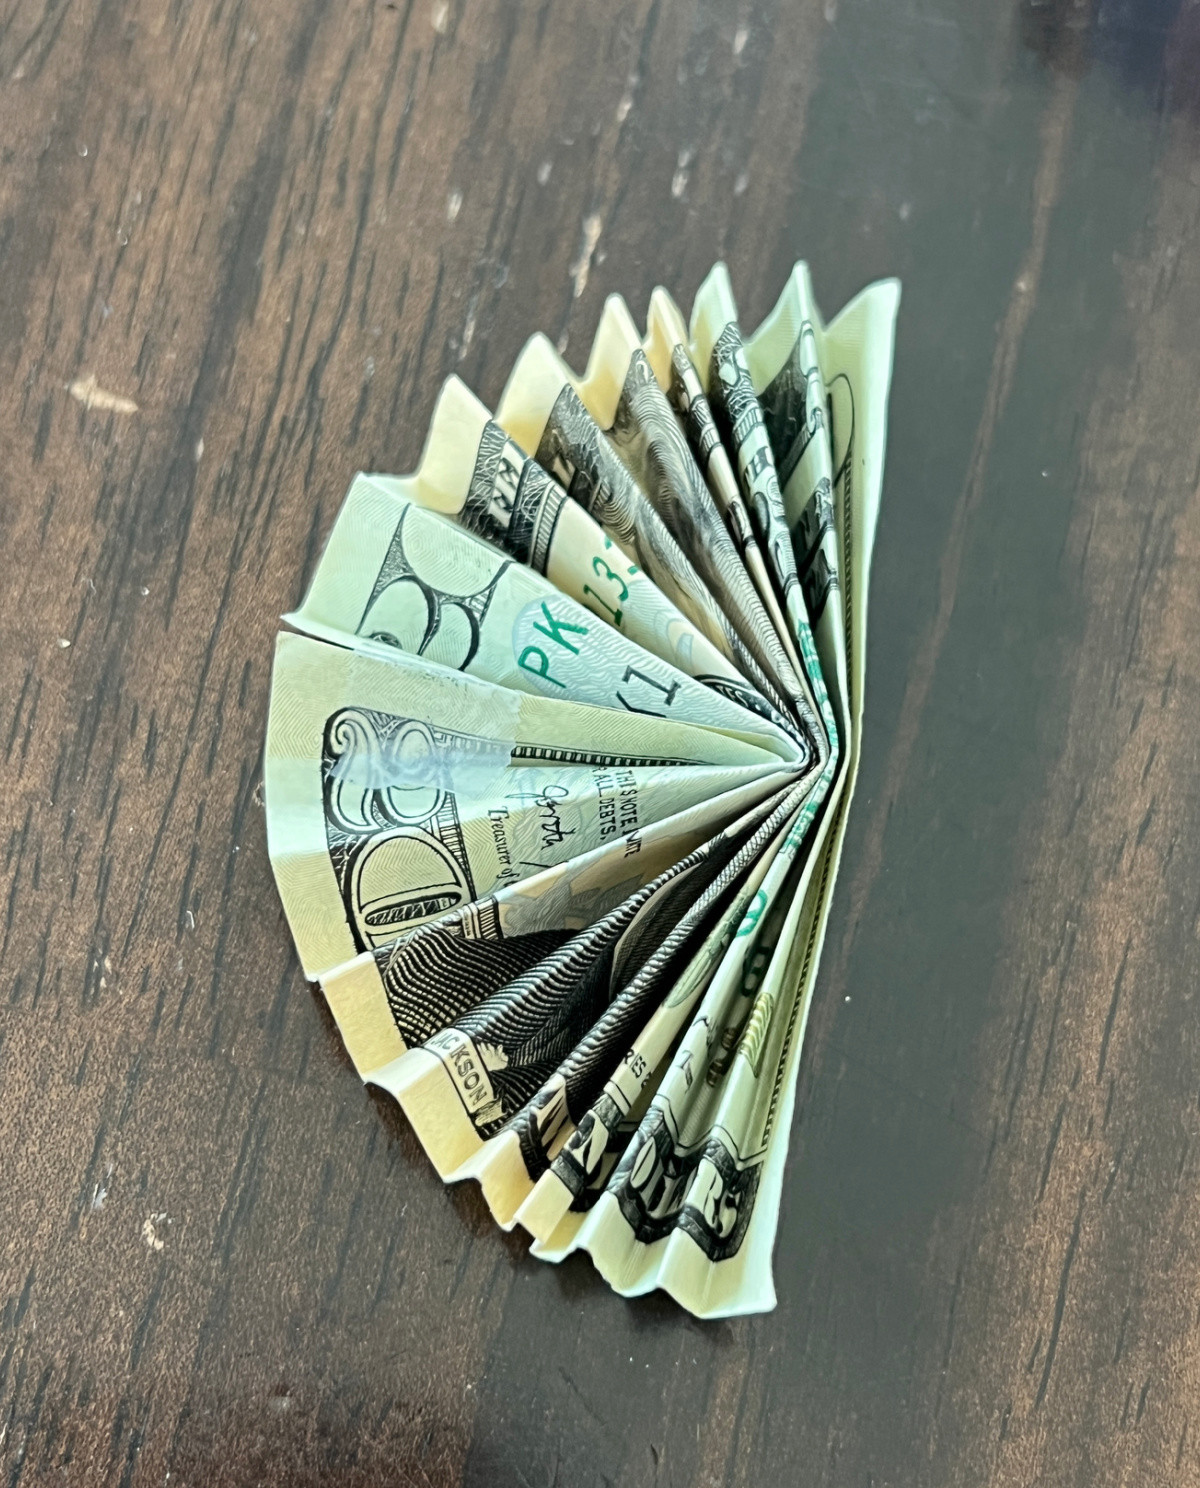 Various folding techniques for creating a money necklace
5. How Do You Assemble the Money Necklace?
Assembling your money necklace involves carefully connecting the folded money pieces to create a cohesive and attractive garland. Here’s a step-by-step guide:
-
Prepare Your Materials:
- Ensure all your money pieces are folded and secured according to your chosen technique.
- Lay out your string or ribbon, beads (if using), and any additional decorative elements.
-
Cut the String or Ribbon:
- Measure and cut the string or ribbon to your desired length, typically around 6-8 feet. This provides enough length for the necklace and allows for tying the ends.
-
Start Threading:
- If using beads, begin by threading a bead onto the center of the string. This will serve as the starting point of your necklace.
-
Attach the Folded Money Pieces:
- Take your first folded money piece and carefully thread the string through it. Depending on the fold, you may need to create a small opening or use an existing one.
- Ensure the money piece is securely attached to the string.
-
Maintain a Pattern (Optional):
- If you’re using a specific pattern (e.g., alternating money folds with decorative paper or beads), maintain consistency as you thread each piece.
- This will create a visually appealing and balanced design.
-
Add Beads (Optional):
- After attaching a money piece, thread a bead onto the string to create separation and visual interest.
- Secure the bead in place by tying a small knot on either side.
-
Continue Threading:
- Repeat the process of attaching folded money pieces and adding beads until you reach your desired length.
- Ensure each money piece is evenly spaced and securely fastened.
-
Finishing Touches:
- Once all the money pieces are attached, add a final bead or decorative element to the end of the string.
- Tie the two ends of the string together, ensuring the necklace fits comfortably over the recipient’s head.
-
Secure the Ends:
- Tie a secure knot to prevent the necklace from unraveling.
- Trim any excess string or ribbon, leaving a small tail for aesthetic appeal.
-
Final Adjustments:
- Inspect the necklace for any loose pieces or uneven spacing.
- Make any necessary adjustments to ensure the necklace looks polished and professional.
By following these steps, you can assemble a beautiful and personalized money necklace that will be cherished by the recipient.
 Assembling a money necklace by threading folded money pieces onto a string
6. Creative Ideas to Personalize Your Money Necklace
To make your money necklace truly special, consider these creative personalization ideas:
- School Colors: Use the graduate’s school colors for the ribbon, beads, and decorative paper to show school spirit.
- Themed Folds: Incorporate origami folds that reflect the recipient’s interests, such as animals, flowers, or symbols.
- Photo Charms: Add small photo charms featuring pictures of the recipient, their friends, or memorable moments.
- Inspirational Quotes: Include small tags with inspirational quotes or personalized messages of encouragement.
- Lucky Numbers: Fold bills into shapes that represent lucky numbers or significant dates for the recipient.
- Favorite Characters: Use paper cutouts of the recipient’s favorite cartoon or movie characters to decorate the necklace.
- Essential Oil Infusion: Lightly scent the ribbon with the recipient’s favorite essential oil for a subtle, pleasant aroma.
- Gift Cards: Incorporate small gift cards to the recipient’s favorite stores or restaurants along with the money.
- Add Tassels: Include decorative tassels at the ends of the necklace for an elegant touch.
- Memory Beads: Use beads that hold small mementos or trinkets representing shared memories.
7. How to Budget for Making a Money Necklace?
Creating a money necklace can be a thoughtful and personalized gift, but it’s essential to budget wisely to ensure you’re not overspending. Here’s how to effectively budget for making a money necklace:
- Determine Your Overall Budget:
- Set a maximum amount you’re willing to spend on the entire project. This will help guide your decisions on the amount of money and types of materials you use.
- Decide on the Amount of Money to Include:
- Choose the total amount of money you want to gift. This will depend on your relationship with the recipient, the occasion, and your financial situation.
- Consider using a mix of denominations (e.g., ones, fives, tens) to make the necklace visually appealing without breaking the bank.
- Allocate Funds for Materials:
- Allocate a portion of your budget for the non-currency materials such as ribbon, beads, decorative paper, tape, and any other embellishments.
- Prioritize essential materials and look for cost-effective alternatives. For example, use craft store coupons or buy in bulk to save money.
- Shop Smart:
- Compare prices at different craft stores or online retailers to find the best deals on materials.
- Consider using materials you already have at home to reduce costs.
- DIY Decorations:
- Instead of buying expensive embellishments, create your own decorations using items like construction paper, markers, and scissors.
- Homemade decorations can add a personal touch while saving money.
- Set a Timeline:
- Plan ahead and give yourself enough time to shop for materials and assemble the necklace. This can help you avoid impulse purchases and last-minute expenses.
- Track Your Spending:
- Keep track of all your expenses to ensure you stay within your budget. Use a spreadsheet or budgeting app to monitor your spending.
- Re-evaluate and Adjust:
- If you find that you’re exceeding your budget, re-evaluate your choices and make adjustments as needed. Consider reducing the amount of money you include or opting for less expensive materials.
According to a recent survey by the National Retail Federation, consumers are increasingly looking for ways to create personalized gifts while staying within budget, making DIY projects like money necklaces a popular choice.
8. Financial Tips for Gift-Giving
Giving gifts is a meaningful way to show appreciation, but it’s important to do so responsibly. Here are some financial tips to keep in mind when giving gifts:
- Set a Budget:
- Determine how much you can afford to spend on gifts for the entire year or for specific occasions.
- Prioritize:
- Focus on gifting to close family and friends first.
- Plan Ahead:
- Start shopping early to avoid last-minute purchases and impulse buys.
- DIY Gifts:
- Consider making homemade gifts, which can be more personal and cost-effective.
- Group Gifting:
- Participate in group gifts to share the cost.
- Use Rewards Programs:
- Take advantage of credit card rewards or loyalty programs to earn discounts or cash back on your purchases.
- Compare Prices:
- Shop around to find the best deals and discounts.
- Give Experiences:
- Consider gifting experiences, such as concert tickets or a cooking class, which can create lasting memories without breaking the bank.
- Gift of Time:
- Offer your time and skills as a gift, such as babysitting, tutoring, or helping with household chores.
- Be Mindful of Debt:
- Avoid going into debt to purchase gifts. Only spend what you can comfortably afford.
9. Money Management Tips for the Gift Recipient
Receiving a money necklace can be a delightful surprise, but it’s important for the recipient to manage the funds wisely. Here are some money management tips for gift recipients:
- Create a Budget:
- Before spending any of the money, create a budget to determine how it will be allocated.
- Set Financial Goals:
- Use the money to achieve a specific financial goal, such as paying off debt, saving for a down payment, or investing.
- Save a Portion:
- Set aside a portion of the money for savings.
- Pay Off Debt:
- Use the money to pay down high-interest debt, such as credit card balances or loans.
- Invest:
- Consider investing a portion of the money in stocks, bonds, or mutual funds to grow your wealth over time.
- Emergency Fund:
- Allocate some of the money to your emergency fund to cover unexpected expenses.
- Treat Yourself:
- Set aside a small portion of the money to treat yourself to something you enjoy, but be mindful of overspending.
- Avoid Impulse Purchases:
- Resist the temptation to make impulse purchases.
- Seek Financial Advice:
- Consult with a financial advisor to create a personalized financial plan.
- Track Your Spending:
- Keep track of how you spend the money to ensure you stay on track with your financial goals.
 Recipient wisely manages money received from a money necklace.
10. FAQ About Money Necklaces
Here are some frequently asked questions about money necklaces:
10.1. How much money should I put in a money necklace?
The amount of money you put in a money necklace depends on your budget and the occasion. Common amounts range from $20 to $100 or more.
10.2. What is the best way to fold the money?
The best way to fold the money depends on your personal preference and the desired look of the necklace. Popular folding techniques include accordion folds, triangle folds, and origami shapes.
10.3. How do I keep the money from falling out?
Use clear tape or glue dots to secure the folded money pieces in place. Ensure the adhesive is strong enough to hold the folds together but can be easily removed if necessary.
10.4. Can I use different denominations of money?
Yes, you can use different denominations of money to create a visually interesting necklace. Mixing ones, fives, and tens is a common approach.
10.5. What kind of string should I use?
Opt for a strong and durable string such as satin ribbon, nylon string, fishing line, or elastic cord. Choose a color that complements the bills or matches the occasion.
10.6. Are money necklaces only for graduations?
No, money necklaces are suitable for a variety of occasions, including birthdays, weddings, holidays, and other special events.
10.7. How long does it take to make a money necklace?
The time it takes to make a money necklace depends on the complexity of the design and your level of experience. A simple necklace can be completed in an hour or two, while more intricate designs may take longer.
10.8. Can I add other decorations to the necklace?
Yes, you can add other decorations to the necklace, such as beads, charms, ribbons, and personalized tags.
10.9. Is it appropriate to give a money necklace as a wedding gift?
Yes, a money necklace can be a thoughtful and practical wedding gift, especially for couples who are saving for a specific goal or need help with wedding expenses.
10.10. Where can I find inspiration for money necklace designs?
You can find inspiration for money necklace designs online through websites like Pinterest, YouTube, and DIY blogs.
Creating a money necklace is a fun and creative way to give a personalized gift. Whether it’s for a graduation, birthday, or any special occasion, a money necklace shows thoughtfulness and effort. Remember to budget wisely and consider the recipient’s financial goals.
For more financial tips and advice, visit money-central.com. We offer a range of resources to help you manage your money effectively and achieve your financial goals. Whether you’re looking for budgeting tools, investment strategies, or debt management tips, money-central.com has you covered.
Ready to take control of your finances? Explore money-central.com today and discover the tools and resources you need to succeed.
Address: 44 West Fourth Street, New York, NY 10012, United States. Phone: +1 (212) 998-0000.