Sending money to friends and family has never been easier, especially for those within the Apple ecosystem. Apple Pay offers a seamless and secure way to transfer funds directly from your iPhone, Apple Watch, or iPad. This guide will walk you through the various methods to send money using Apple Pay, ensuring you can quickly and efficiently manage your peer-to-peer payments.
Whether you’re splitting a bill, sending a gift, or paying someone back, understanding How To Send Money On Apple Pay is a valuable skill. Let’s explore the different ways you can utilize this convenient feature.
Sending Money via Messages App with Apple Cash
One of the most intuitive ways to send money on Apple Pay is directly through the Messages app. This method is perfect for casual transactions within conversations you’re already having. Here’s how to do it on your iPhone:
-
Open Messages: Launch the Messages app on your iPhone and either start a new conversation or select an existing one with the person you want to send money to.
-
Access Apple Cash: Tap the plus (+) icon located to the left of the message input field. From the options that appear, tap on “Apple Cash”.
-
Enter Amount: Input the exact amount of money you wish to send in the designated field. Then, tap “Send”.
-
Add a Comment (Optional): You have the option to add a comment to your payment. This comment will be visible in the transaction history for both you and the recipient, helping to keep track of your payments.
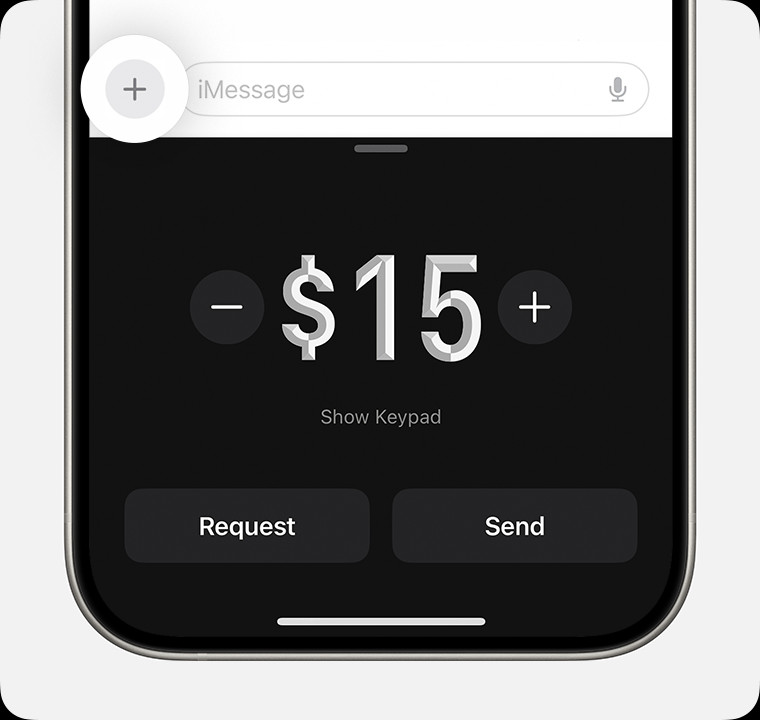 Image of iPhone sending money in the Messages app
Alt text: Sending money via Apple Cash in Messages app on iPhone, showing amount entry and send button.
-
Review and Send: Tap the “Send” button to proceed to the payment review screen.
-
Choose Payment Method (If Needed): By default, Apple Cash uses your Apple Cash balance. If you prefer to use a debit card or if your Apple Cash balance is insufficient, tap “Change Payment Method”.
- Switch to Debit Card: Toggle off the “Apple Cash” slider and select your preferred debit card from the list.
-
Confirm Payment: Double-click the side button on your iPhone to initiate the payment process. Authenticate using Face ID, Touch ID, or your passcode to finalize sending the money.
If you haven’t yet added a debit card to your Wallet, you’ll be prompted to add one to complete the transaction.
Sending Money via Messages on Apple Watch:
For quick transactions right from your wrist, you can also send money on Apple Pay through your Apple Watch:
-
Open Messages on Apple Watch: Access the Messages app and select the conversation with your recipient.
-
Access Apple Cash: Tap the plus (+) icon and then tap “Apple Cash”.
-
Adjust Amount: Use the minus (-) or plus (+) signs, or the Digital Crown, to set the amount you want to send.
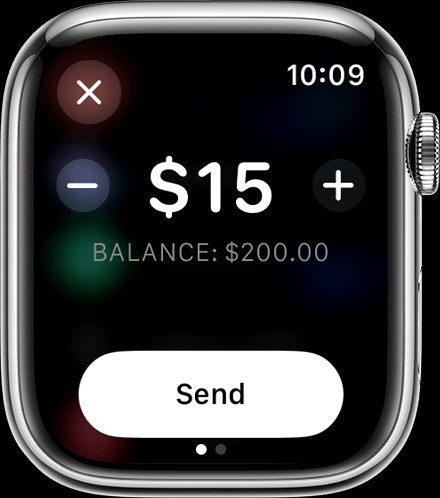 Image of Apple Watch sending money in the Messages app.
Alt text: Sending money with Apple Cash via Messages app on Apple Watch, displaying amount adjustment and send button.
-
Send Payment: Tap “Send”, review the details, and then double-click the side button to send the payment securely.
Sending Money Through the Wallet App with Apple Cash
Another direct method to send money on Apple Pay is through the Wallet app. This is useful when you’re managing your finances directly and want to initiate a payment. Here’s how it works:
-
Open Wallet App: On your iPhone, open the Wallet app and tap on your Apple Cash card.
-
Initiate Send or Request: Tap either “Send” or “Request”, then select a contact from your list or add a new recipient to send money to.
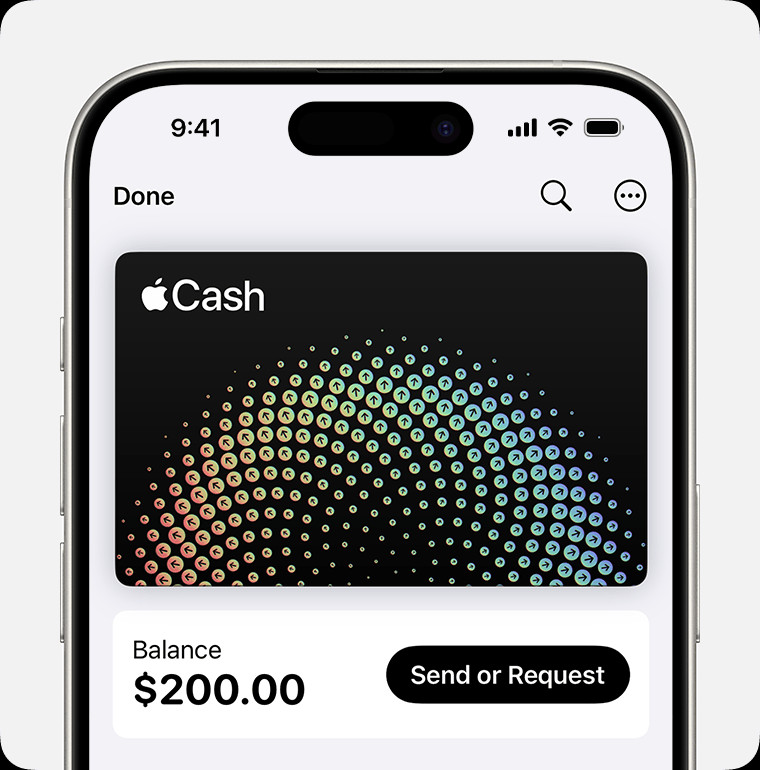 Image of iPhone sending money in the Wallet app
Alt text: Sending money using Apple Cash directly from the Wallet app on iPhone, highlighting send and request options.
-
Enter Amount: Tap “Next”, then enter the amount of money you wish to send.
-
Confirm and Send: Tap “Send”, then tap the “Send” button on the confirmation screen.
-
Authenticate Payment: Double-click the side button to confirm the payment and use Face ID, Touch ID, or your passcode to authorize the transaction.
Utilizing Tap to Cash for In-Person Transfers
For sending money to someone nearby, Apple Pay’s Tap to Cash feature offers a contactless and immediate transfer option. This eliminates the need to exchange phone numbers or email addresses.
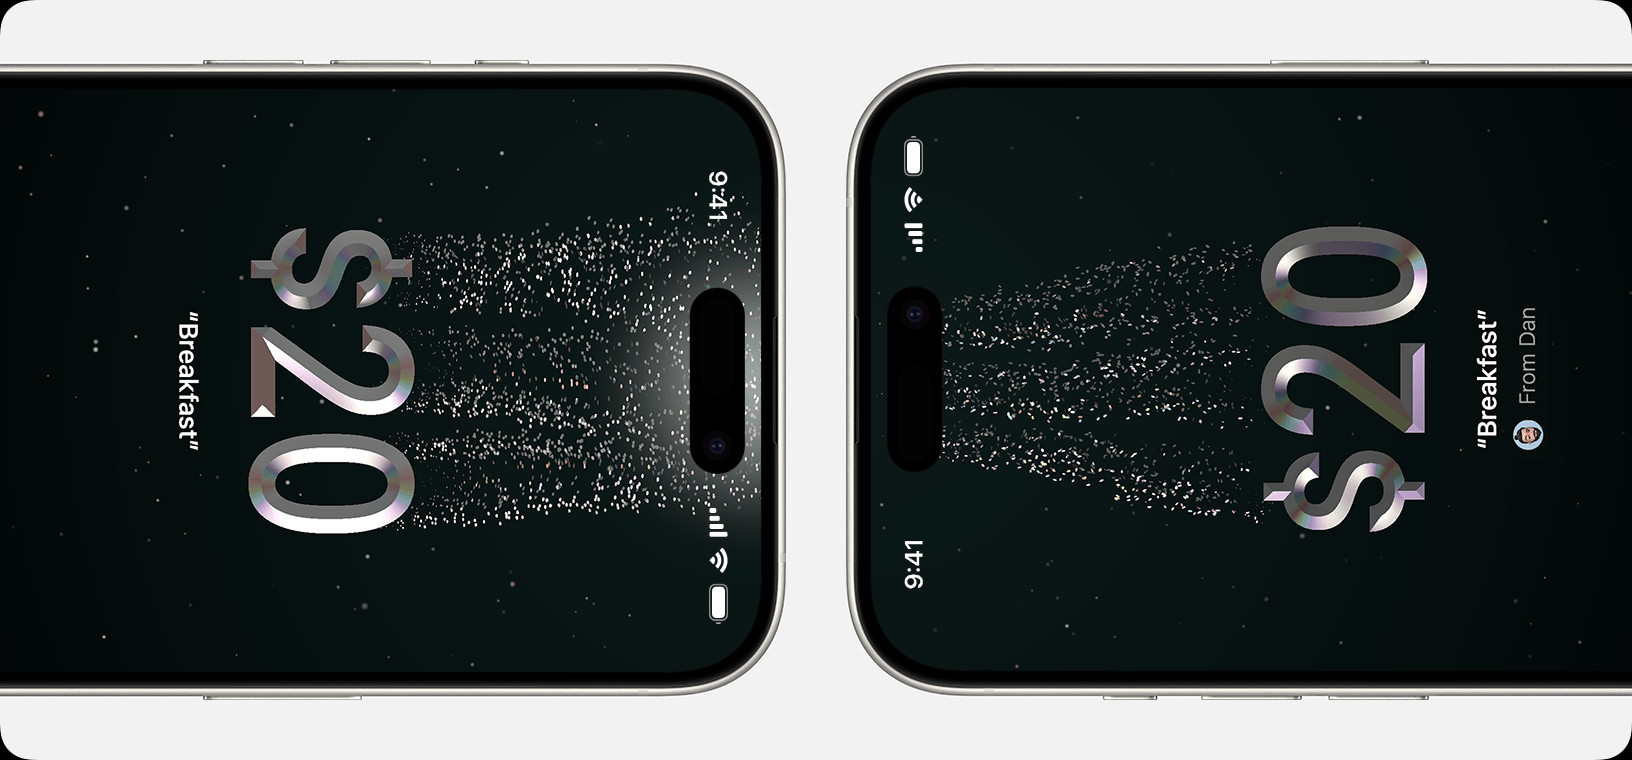 Image of the top of two iPhones next to each other
Alt text: Tap to Cash feature on Apple Pay for sending money in person between two iPhones, demonstrating proximity transfer.
To learn more about using Tap to Cash for sending and receiving money with someone nearby, you can refer to Apple’s support documentation.
Setting Up Recurring Payments in Wallet
For regular payments, such as allowances or rent, Apple Pay allows you to set up recurring payments, simplifying your routine transactions:
-
Access Recurring Payments: Open the Wallet app, tap your Apple Cash card, then tap the “More” button (…). Select “Recurring Payments” and then “New Recurring Payment.”
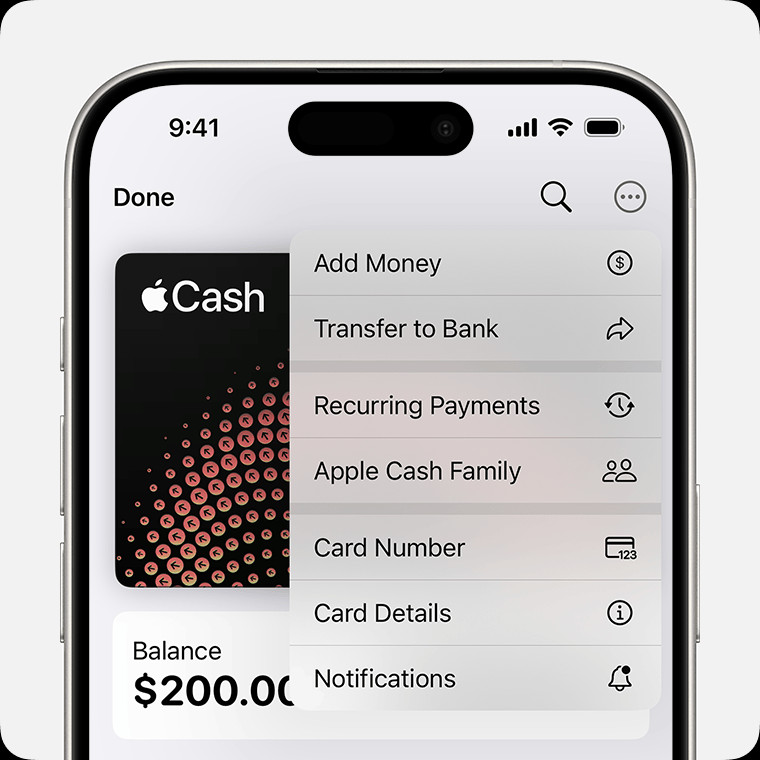 Image of iPhone showing the More menu with Recurring Payments selected
Alt text: Accessing Recurring Payments option in Apple Cash settings within the Wallet app on iPhone.
-
Configure Payment Schedule: Add the recipient, then follow the on-screen prompts to specify the payment amount, start date, and frequency (weekly, biweekly, or monthly). You can also add a memo for identification.
-
Review and Confirm: Tap “Send”, then tap the “Send” button to review the recurring payment setup.
-
Authorize Setup: Double-click the side button and authenticate with Face ID, Touch ID, or your passcode to finalize the recurring payment schedule.
You can easily edit, cancel, or pause these recurring payments at any time through the Wallet app, giving you full control over your scheduled transactions.
Important Considerations When Sending Money on Apple Pay
- Identity Verification: For full functionality and FDIC insurance eligibility of your Apple Cash account, you may need to verify your identity.
- Transaction Limits: Be aware of transaction limits, especially for Apple Cash Family accounts and Tap to Cash, which may have limits on the amount you can send or receive within a certain period. Always refer to the Apple Cash Terms and Conditions for the most up-to-date limits and details.
- Security: Apple Cash person-to-person payments are private transactions, so it’s crucial to only send and receive money with people you know and trust.
By mastering these methods, you can confidently send money on Apple Pay for various needs, enjoying the convenience and security Apple’s payment system offers. Whether it’s through Messages, the Wallet app, or Tap to Cash, Apple Pay provides versatile solutions for all your peer-to-peer payment requirements.