Sending money to friends and family has never been easier, especially with the advent of digital payment systems like Apple Pay. Apple Pay offers a seamless and secure way to transfer funds directly from your Apple devices. Whether you’re splitting a bill, sending a gift, or paying someone back, knowing How To Send Money With Apple Pay can simplify your transactions. This guide will walk you through various methods to send money using Apple Pay, ensuring you can confidently navigate this convenient feature.
Sending Money via Messages App on iPhone
The Messages app provides a quick and intuitive way to send money using Apple Pay. Here’s how you can do it on your iPhone:
-
Open Messages: Launch the Messages app on your iPhone and either start a new conversation or select an existing one with the person you wish to send money to.
-
Access Apple Cash: Tap the plus (+) icon located next to the text input field. From the options that appear, tap on the Apple Cash icon.
-
Enter Amount: Input the exact amount of money you intend to send. Then, tap “Send”.
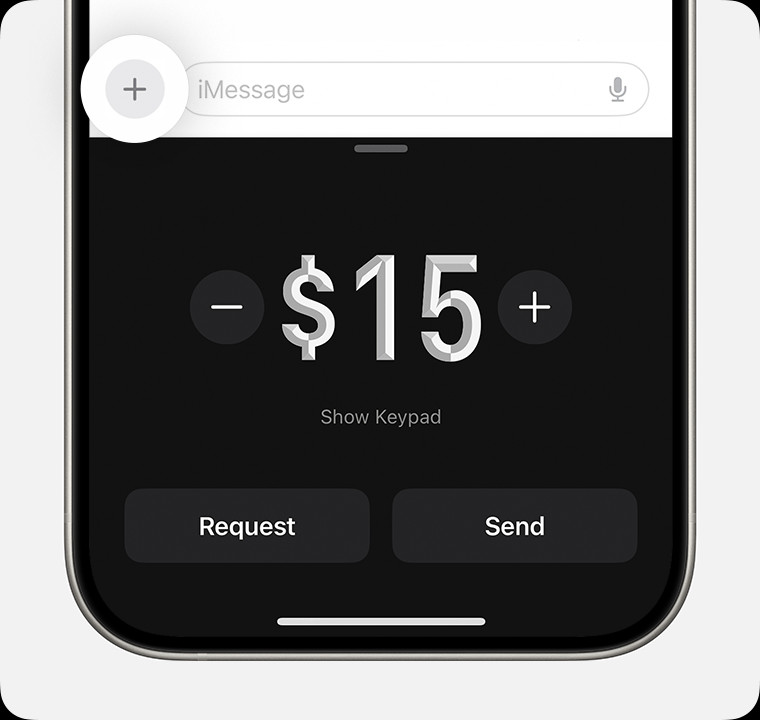 Image of iPhone sending money in the Messages app
 -
Add a Comment (Optional): You have the option to add a comment or note. This comment will be visible in the transaction history for both you and the recipient, making it easier to remember the purpose of the payment.
-
Review Payment: Tap the “Send” button to review your payment details before finalizing the transaction.
-
Choose Payment Method (If Needed): By default, Apple Pay uses your Apple Cash balance. If you prefer to use a debit card directly, tap “Change Payment Method”.
- Switch to Debit Card: Turn off the Apple Cash slider, and then select your preferred debit card from the listed options.
-
Insufficient Apple Cash Balance?: If your Apple Cash balance isn’t sufficient to cover the full amount, you can use a debit card to cover the remaining balance. Apple Pay will display both your Apple Cash card and debit card, showing the respective amounts to be deducted from each.
-
Confirm Payment: Double-click the side button on your iPhone to initiate the payment process. Authenticate the transaction using Face ID, Touch ID, or your passcode to complete sending the money.
If you haven’t yet added a debit card to your Wallet app, you’ll need to do so before sending money directly from a debit card.
Sending Money via Messages App on Apple Watch
You can also conveniently send money using Apple Pay directly from your Apple Watch. Follow these steps:
-
Open Messages: Open the Messages app on your Apple Watch and select an existing conversation.
-
Access Apple Cash: Tap the plus (+) icon, then tap the Apple Cash icon.
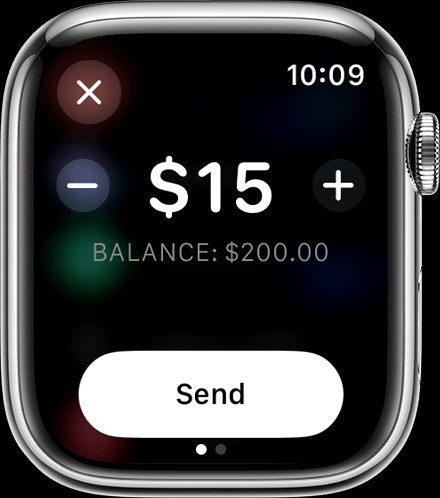 Image of Apple Watch sending money in the Messages app.
 -
Adjust Amount: To modify the preset amount, tap the minus (-) or plus (+) signs. Alternatively, you can use the Digital Crown for more precise amount adjustments.
-
Review and Send: Tap “Send”, carefully review the payment details displayed, and cancel if necessary.
-
Confirm Payment: Double-click the side button on your Apple Watch to send the payment.
Sending Money via Wallet App on iPhone
The Wallet app offers another avenue for sending money with Apple Pay. Here’s how:
-
Open Wallet App: On your iPhone, open the Wallet app. Then, tap on your Apple Cash card.
-
Send or Request: Tap either “Send” or “Request”, depending on whether you are sending money or requesting it from someone. Select an existing contact or add a new contact to specify the recipient.
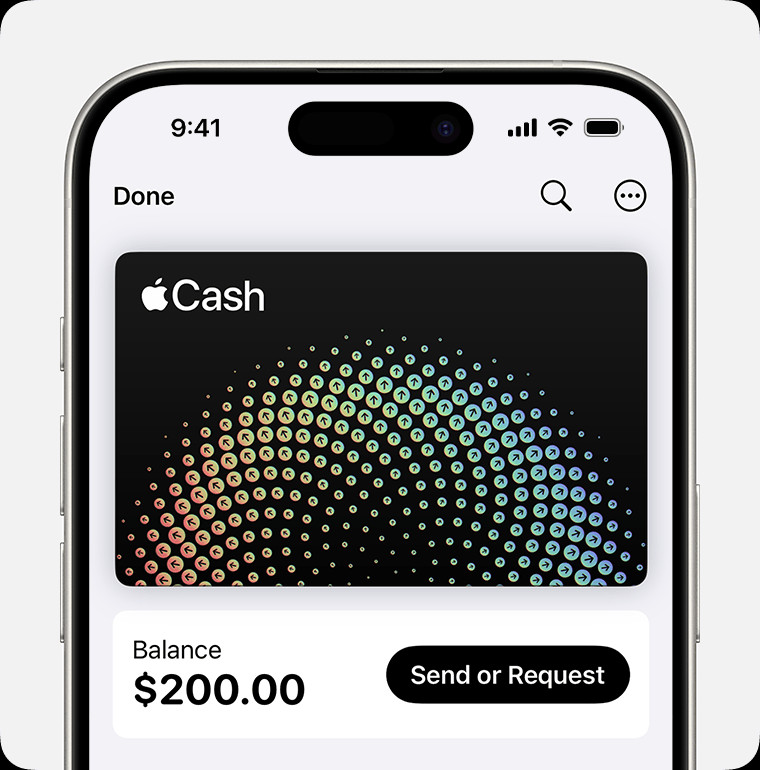 Image of iPhone sending money in the Wallet app
 -
Enter Amount: Tap “Next”, then enter the amount you wish to send.
-
Initiate Payment: Tap “Send”, followed by tapping the “Send” button to proceed.
-
Confirm Payment: Double-click the side button to finalize the payment. Authenticate using Face ID, Touch ID, or your passcode.
Using Tap to Cash for In-Person Transfers
For in-person transactions, Apple Pay provides “Tap to Cash,” a feature that allows you to send and receive money with someone nearby without needing to exchange phone numbers or email addresses.
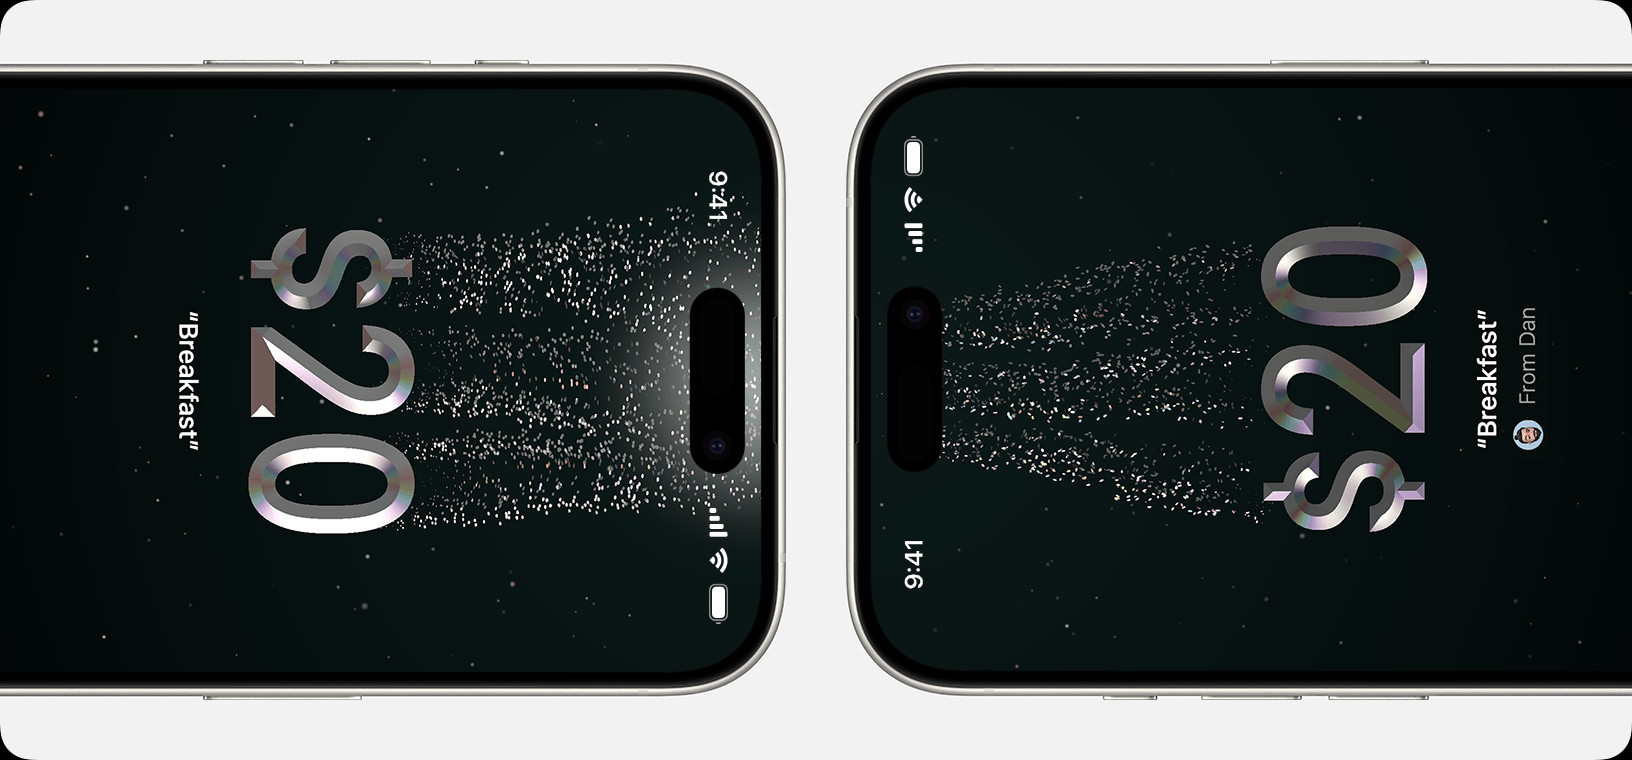 Image of the top of two iPhones next to each other
To learn more about using Tap to Cash, you can refer to Apple’s support documentation on sending and receiving Apple Cash with someone nearby.
Setting Up Recurring Payments in Wallet
If you need to send money regularly, Apple Pay allows you to set up recurring payments directly within the Wallet app. You can schedule weekly, biweekly, or monthly payments. Here’s how to set it up:
-
Open Wallet and Apple Cash: Open the Wallet app on your iPhone and tap your Apple Cash card.
-
Access Recurring Payments: Tap the “More” button (represented by three dots), then select “Recurring Payments”, and finally tap “New Recurring Payment”.
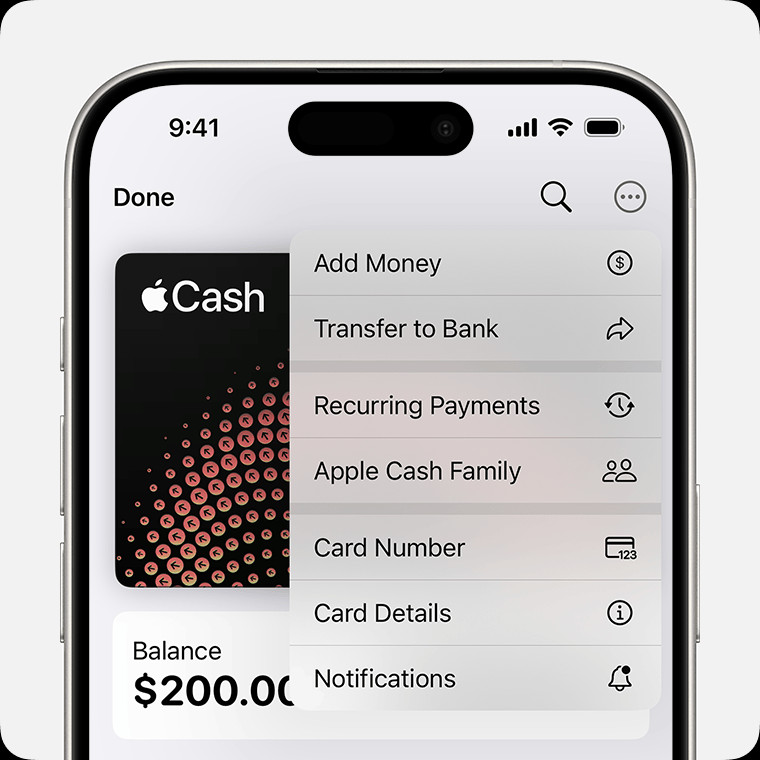 Image of iPhone showing the More menu with Recurring Payments selected
 -
Configure Payment Schedule: Add the recipient, and follow the on-screen prompts to specify the payment amount, start date, and frequency (weekly, biweekly, or monthly). You can also add a memo to identify the purpose of these recurring payments.
-
Review and Confirm: Tap “Send”, then tap the “Send” button to review all the details of your recurring payment setup.
-
Finalize Setup: Double-click the side button and authenticate with Face ID, Touch ID, or your passcode to confirm and activate the recurring payment schedule.
You can easily edit, cancel, or pause a recurring payment at any time through the Recurring Payments section in your Apple Cash card settings.
Accepting Payments with Apple Cash
When someone sends you money via Apple Pay, it is securely deposited into your Apple Cash account. You can use this money for Apple Pay purchases, send it to others, or transfer it to your bank account or debit card.
When accepting a payment for the first time, you might be required to verify your identity to ensure the security and full functionality of your Apple Cash account. This verification is a one-time process and helps in making your account FDIC-insured.
You can choose to accept payments automatically or manually. To manage this setting:
- Open Wallet and Apple Cash Card: Open the Wallet app and tap on your Apple Cash card.
- Access Card Details: Tap the “More” button, then tap “Card Details”.
- Choose Acceptance Mode: Tap “Manually Accept Payments” or “Automatically Accept Payments” to set your preference.
With “Manually Accept Payments” enabled, you need to open the Messages conversation, tap “Accept,” and follow the instructions to receive the money. You have a 7-day window to accept a payment. If you haven’t set up Apple Cash when someone sends you money, tapping “Accept” in the message will guide you through the setup process.
Rejecting Payments
If you need to reject a payment sent to you via Apple Pay, follow these steps:
- Open Wallet and Find Transaction: Open the Wallet app, tap your Apple Cash card, and locate the payment in your “Latest Transactions”.
- Reject Payment: Tap on the payment, tap the payment again to view details, and then tap “Reject Payment”.
If you don’t see the “Reject Payment” option, it might be because you have already accepted the payment.
Requesting Payments via Messages
Need to request money from someone? Apple Pay makes it simple:
On your iPhone:
-
Start or Open Conversation: Open a conversation in the Messages app or start a new one.
-
Access Apple Cash Request: Tap the plus (+) icon, tap Apple Cash, enter the amount you are requesting, and then tap “Request”.
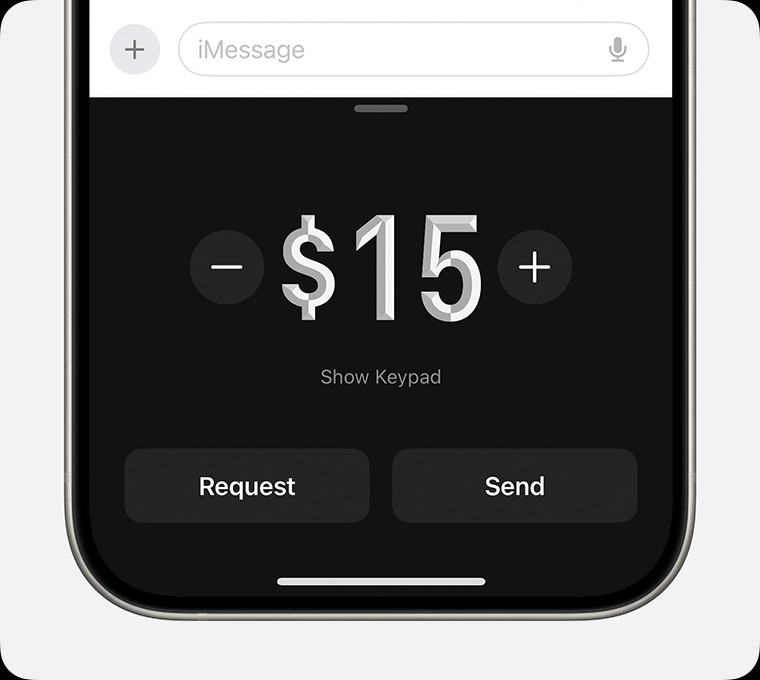 Image of iPhone requesting money in the Messages app
 -
Send Request: Tap the “Send” button to send your payment request.
On your Apple Watch:
- Open Messages: Open the Messages app and choose a conversation.
- Access Apple Cash Request: Tap the plus (+) icon, then tap Apple Cash.
- Enter Amount and Request: Enter the amount, then swipe left on the “Send” button to reveal the “Request” button. Tap “Request”.
Responding to Payment Requests
When you receive a payment request, responding is straightforward:
On your iPhone:
- Open Request: Open the request in the Messages app, then tap “Pay” on the message.
- Review and Send: Review the amount to send. Tap the “Send” button to proceed. You can adjust the amount if needed before tapping “Send”.
- Confirm Payment: Double-click the side button to pay and authenticate with Face ID, Touch ID, or your passcode.
To decline a request, simply ignore the message.
On your Apple Watch:
- Open Request: Open the request in the Messages app, then tap “Pay” on the message.
- Review and Send: Review the amount, tap “Send” to continue. Adjust the amount using the Digital Crown if necessary, then tap “Send”.
- Confirm Payment: Double-click the side button to confirm and send your payment.
Canceling a Sent Payment
If you’ve sent a payment that is still pending (the recipient hasn’t accepted it yet), you can cancel it from your Apple Cash transaction history. Pending transactions are marked as such and allow cancellation.
Apple Cash person-to-person payments are designed for transactions between people you know and trust, similar to any private transaction. Always ensure you are sending and receiving money with individuals you recognize.
Conclusion
Understanding how to send money with Apple Pay can significantly enhance your financial interactions, making transactions quicker and more secure. From sending money via Messages or the Wallet app to setting up recurring payments and utilizing Tap to Cash, Apple Pay offers a versatile suite of features for various money-transfer needs. By following this guide, you can efficiently use Apple Pay to manage your payments and transfers with ease and confidence.
Apple Cash services are provided by Green Dot Bank, Member FDIC. Apple Payments Services LLC, a subsidiary of Apple Inc., is a service provider of Green Dot Bank for Apple Cash accounts. Neither Apple Inc. nor Apple Payments Services LLC is a bank. Learn more about the Terms and Conditions. Only available in the U.S. on eligible devices. To send and receive money with an Apple Cash account, you must be 18 and a U.S. resident. If you’re under 18, your family organizer can set up Apple Cash for you as part of their Apple Cash Family account, but you may not be able to access features that require a supported payment card. Security checks may require more time to make funds available. Apple Cash Family accounts can only send or receive up to $2000 within a rolling seven-day period. Tap to Cash transactions can only be used to send or receive up to $2000 within a rolling seven-day period. Other limits apply, see Terms and Conditions for details. To access and use all Apple Cash features, you must have an eligible device with Wallet that has the latest version of iOS.
Apple Pay is a service provided by Apple Payments Services LLC, a subsidiary of Apple Inc. Neither Apple Inc. nor Apple Payments Services LLC is a bank. Any card used in Apple Pay is offered by the card issuer.