In today’s fast-paced digital world, transferring money quickly and securely is more important than ever. Whether you’re splitting a bill with friends, sending a gift to family, or paying for services, having a reliable method for digital money transfer is essential. Apple Cash offers a seamless solution for Apple users to send and receive money right from their devices. This guide will walk you through everything you need to know about How To Transfer Money using Apple Cash, making your financial transactions smoother and more efficient.
What is Apple Cash and Why Use It?
Apple Cash is a digital payment service built into Apple Wallet, allowing you to send and receive money with ease. It’s designed for person-to-person payments, making it perfect for everyday transactions. Before diving into the “how-to”, let’s understand why Apple Cash is a great choice for transferring money:
- Convenience: Integrated directly into your iPhone, iPad, and Apple Watch, Apple Cash is readily accessible whenever you need to send or receive funds.
- Speed: Transfers are typically instant, allowing for quick transactions when you need them most.
- Security: Backed by Apple’s robust security features, including Face ID, Touch ID, and passcode authentication, your money transfers are secure.
- FDIC Insurance: After identity verification, your Apple Cash balance is FDIC-insured, providing an added layer of security and trust.
To get started with transferring money via Apple Cash, there are a few things you’ll need:
- An eligible Apple device (iPhone, iPad, or Apple Watch) with the latest version of iOS or watchOS.
- An Apple Cash account set up in your Wallet app.
- For full functionality and FDIC insurance eligibility, you may need to verify your identity.
Now, let’s explore the different ways you can transfer money using Apple Cash.
Sending Money via Messages App
One of the most convenient ways to send money with Apple Cash is directly through the Messages app. This method is perfect for sending money to contacts you’re already chatting with. Here’s how to do it on your iPhone:
-
Open Messages: Launch the Messages app on your iPhone and either start a new conversation or select an existing one.
-
Access Apple Cash: Tap the plus icon located to the left of the text field, and then tap the Apple Cash icon.
-
Enter Amount: Enter the amount of money you wish to send.
-
Add a Comment (Optional): You can add a comment that will appear in the transaction history for both you and the recipient, helping to clarify the purpose of the payment.
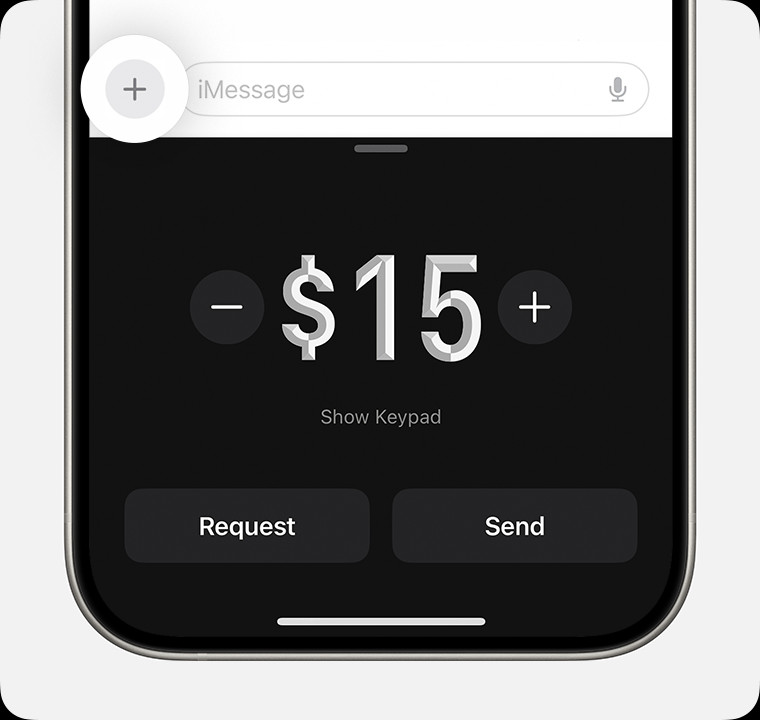 Image of iPhone sending money in the Messages app
Alt Text: Sending money with Apple Cash in Messages app on iPhone, showing amount entry and send button.
-
Review Payment: Tap the “Send” button to review your payment details.
-
Choose Payment Method (Optional): By default, Apple Cash uses your Apple Cash balance. If you prefer to use a debit card, tap “Change Payment Method” and toggle off the Apple Cash slider to select your debit card.
-
Confirm Payment: Double-click the side button on your iPhone to authorize the payment using Face ID, Touch ID, or your passcode.
If your Apple Cash balance doesn’t cover the full amount, you can use a debit card to pay the remaining balance.
Sending money via Apple Watch is equally straightforward:
-
Open Messages: Open the Messages app on your Apple Watch and select an existing conversation.
-
Access Apple Cash: Tap the plus icon, then tap the Apple Cash icon.
-
Adjust Amount: Use the minus or plus signs, or the Digital Crown, to set the amount you want to send.
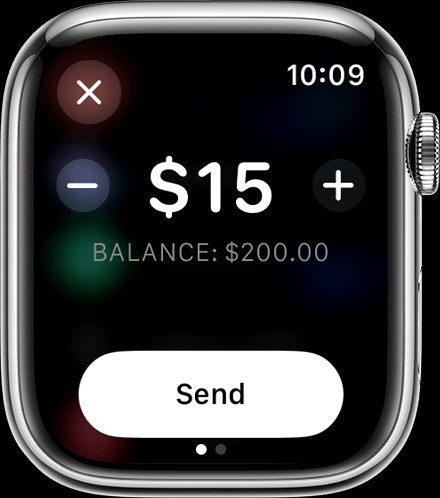 Image of Apple Watch sending money in the Messages app.
Alt Text: Transfer money using Apple Cash on Apple Watch via Messages app, showing amount adjustment using Digital Crown.
-
Review and Send: Tap “Send,” review the payment, and then double-click the side button to send.
Sending Money via Wallet App
Alternatively, you can initiate money transfers directly from the Wallet app on your iPhone. This method is useful when you want to send money to someone not currently in your Messages conversation.
-
Open Wallet App: Launch the Wallet app on your iPhone and tap your Apple Cash card.
-
Choose Send or Request: Tap either “Send” to initiate a payment or “Request” to ask for money. For sending money, tap “Send”.
-
Select Recipient: Choose a contact from your list or add a new contact to send money to.
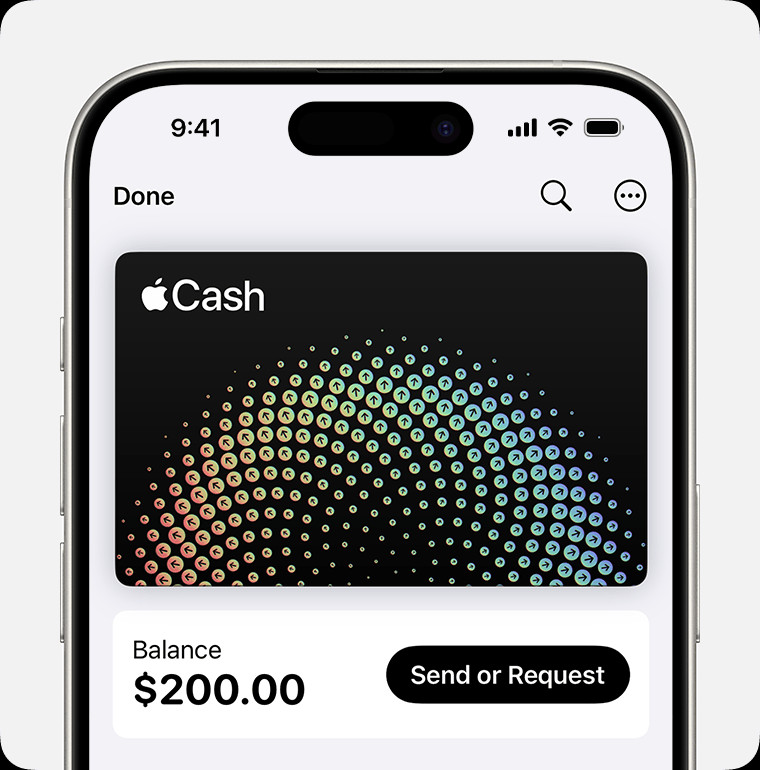 Image of iPhone sending money in the Wallet app
Alt Text: Sending money through Apple Cash in Wallet app on iPhone, highlighting send and request options.
-
Enter Amount and Send: Tap “Next,” enter the amount you want to send, tap “Send,” and then tap the “Send” button to review.
-
Confirm Payment: Double-click the side button and confirm with Face ID, Touch ID, or your passcode.
Using Tap to Cash for In-Person Transfers
For transferring money to someone nearby physically, Apple Cash offers “Tap to Cash”. This feature allows you to send money by simply holding your iPhone near the recipient’s iPhone, without needing to share phone numbers or email addresses.
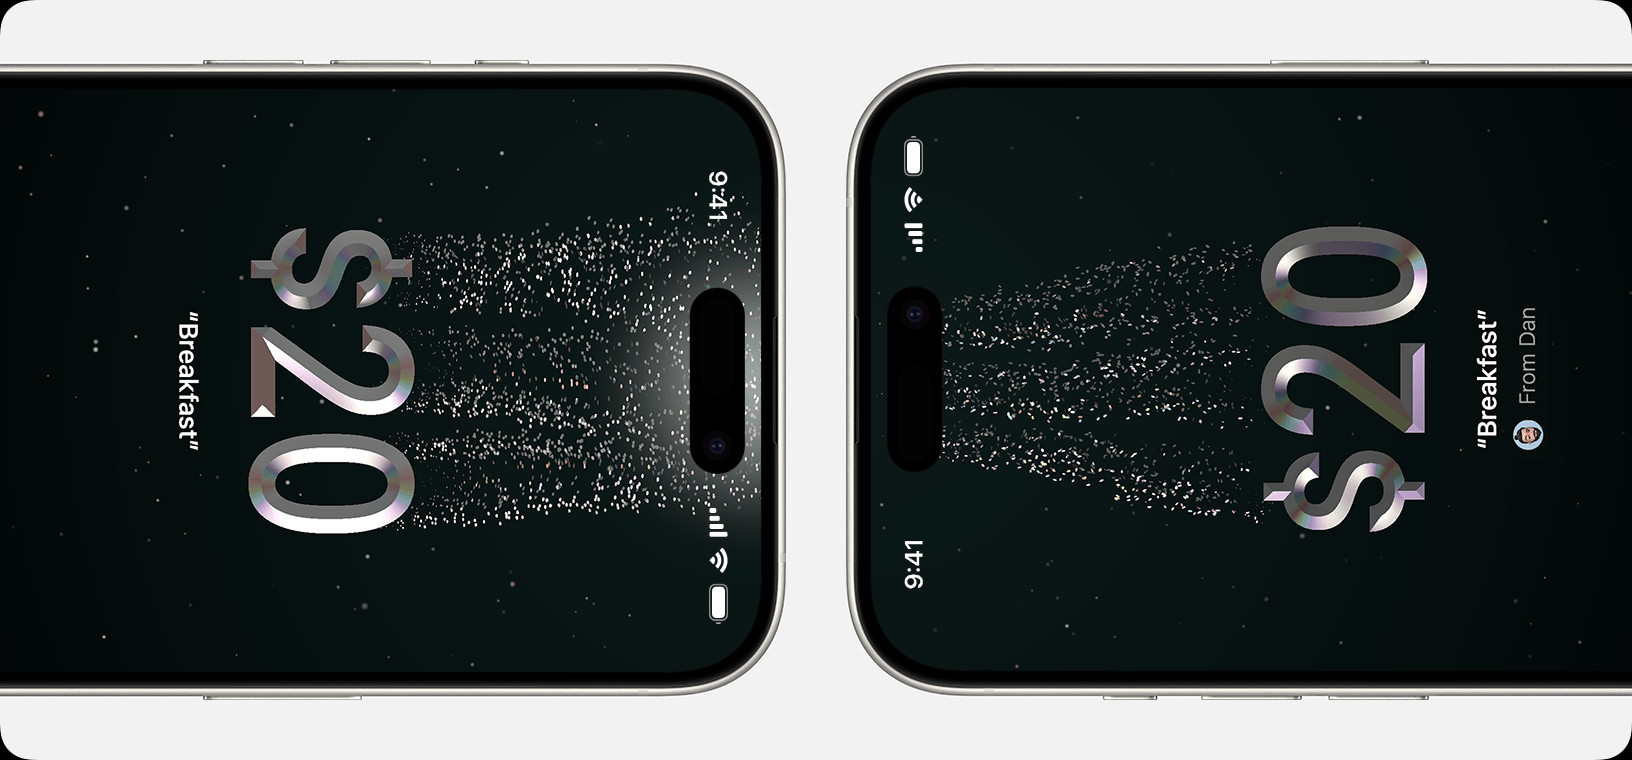 Image of the top of two iPhones next to each other
Alt Text: Tap to Cash feature for transferring money in person with Apple Cash on iPhones.
To use Tap to Cash, ensure both iPhones are unlocked and simply hold them close together. Follow the on-screen prompts to complete the transfer. This is a fast and convenient option for in-person transactions.
Setting Up Recurring Payments
If you need to send money regularly, like for rent or allowances, Apple Cash allows you to set up recurring payments. Here’s how:
-
Open Wallet and Apple Cash: Open the Wallet app and tap your Apple Cash card.
-
Access Recurring Payments: Tap the “More” button (represented by three dots), then tap “Recurring Payments,” and finally “New Recurring Payment.”
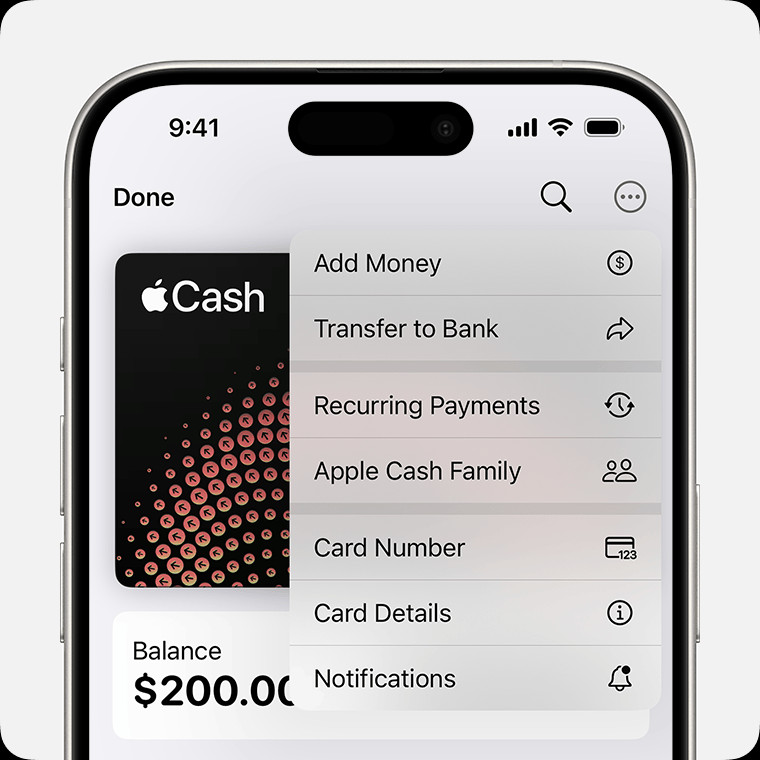 Image of iPhone showing the More menu with Recurring Payments selected
Alt Text: Setting up recurring payments with Apple Cash in Wallet app on iPhone, showing recurring payments option in menu.
-
Configure Payment Details: Add the recipient, choose the payment amount, select the start date, and set the frequency (weekly, biweekly, or monthly). You can also add a memo for identification.
-
Review and Confirm: Tap “Send,” review the payment details, and double-click the side button to confirm and set up the recurring payment.
You can easily edit, cancel, or pause recurring payments by accessing the “Recurring Payments” section in your Apple Cash card settings in the Wallet app.
Receiving Money with Apple Cash
When someone sends you money via Apple Cash, it’s securely deposited into your Apple Cash balance. You can use this money to make purchases with Apple Pay, send it to others, or transfer it to your bank account or debit card.
To receive payments, ensure you have Apple Cash set up. You can choose to accept payments automatically or manually:
- Open Wallet and Card Details: Open the Wallet app, tap your Apple Cash card, then tap the “More” button and select “Card Details.”
- Choose Acceptance Mode: Tap “Manually Accept Payments” or “Automatically Accept Payments” based on your preference.
With manual acceptance, you’ll need to open the Messages conversation and tap “Accept” within 7 days to receive the money. Automatic acceptance deposits the money directly into your Apple Cash balance without requiring manual action.
Requesting Money with Apple Cash
Need to request money from someone? Apple Cash makes it simple to send payment requests.
On iPhone:
-
Open Messages: Open the Messages app and start or select a conversation.
-
Access Apple Cash and Request: Tap the plus icon, tap Apple Cash, enter the amount you’re requesting, and tap “Request.”
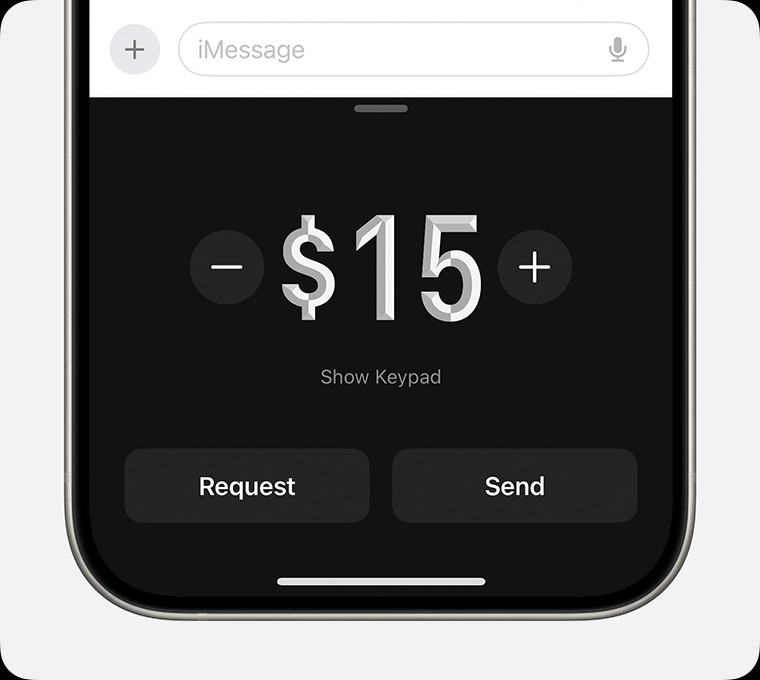 Image of iPhone requesting money in the Messages app
Alt Text: Requesting money with Apple Cash in Messages app on iPhone, showing request money option.
-
Send Request: Tap the “Send” button to send your payment request.
On Apple Watch:
- Open Messages: Open Messages on your Apple Watch and choose a conversation.
- Access Apple Cash and Request: Tap the plus icon, tap Apple Cash, enter the amount, and swipe left on the “Send” button to reveal the “Request” button.
- Send Request: Tap “Request” to send your payment request.
The recipient can then easily pay the request directly from the Messages app.
Cancelling a Payment
If you’ve sent a payment that is still pending (meaning the recipient hasn’t accepted it yet), you can cancel it. Check your Apple Cash transaction history in the Wallet app. Pending transactions can be cancelled, ensuring you retain control over your funds.
Conclusion
Apple Cash simplifies the process of transferring money, offering a secure, fast, and convenient way to send and receive funds directly from your Apple devices. Whether you are splitting costs with friends, managing family finances, or handling everyday transactions, understanding how to transfer money with Apple Cash can significantly enhance your digital financial toolkit. With its integration across Apple devices and user-friendly interface, Apple Cash stands out as an excellent solution for modern money transfers.
Apple Cash services are provided by Green Dot Bank, Member FDIC. Apple Payments Services LLC, a subsidiary of Apple Inc., is a service provider of Green Dot Bank for Apple Cash accounts. Neither Apple Inc. nor Apple Payments Services LLC is a bank. Learn more about the Terms and Conditions. Only available in the U.S. on eligible devices.
