Delve into the fascinating world of historical crafts and create your own replica of a medieval Norwegian Money pouch. Inspired by extant pouches dating back to the late 13th and early 14th centuries, this DIY project offers a tangible connection to Norway’s rich past and the practical money carrying methods of the time. While the concept of a money pouch might seem antiquated in our digital age, understanding its history provides valuable context to how people managed their finances in earlier eras. These pouches, as noted by Olaf Goubitz in “purses in pieces,” were a common and enduring design, used for centuries across Europe and beyond, highlighting the timeless functionality of simple, secure ways to carry Norwegian money and other valuables.
This tutorial will guide you through crafting a slightly smaller version of the historical Norwegian money pouch, perfectly sized for modern hands while maintaining the charm and authenticity of the original design. Using soft leather and basic tools, you can create a durable and historically inspired accessory. Let’s embark on this crafting journey and bring a piece of Norwegian history to life.
Materials You’ll Need:
- Soft leather (recycled leather jacket or similar)
- Paper for pattern
- Pencil
- Awl or hole punch
- Scissors or craft knife
- Ruler
- Blunt needle
Step-by-Step Tutorial:
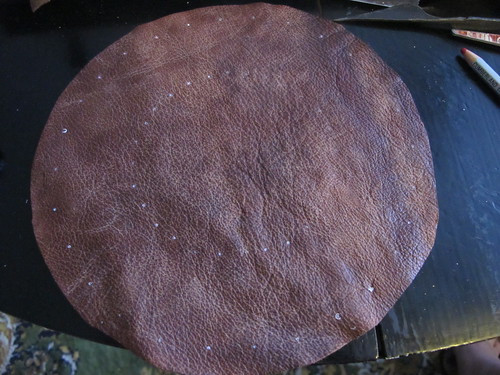
- Cutting the Leather: Begin by cutting out a circular piece of leather. This will form the main body of your Norwegian money pouch. You will also need to cut two thin strips of leather. One strip should be approximately 50 cm long, and the other around 65 cm long. For an authentic look, aim for a width of about 1 cm for these strips, or even thinner if you prefer a more delicate appearance.
 Circular leather piece for Norwegian money pouch
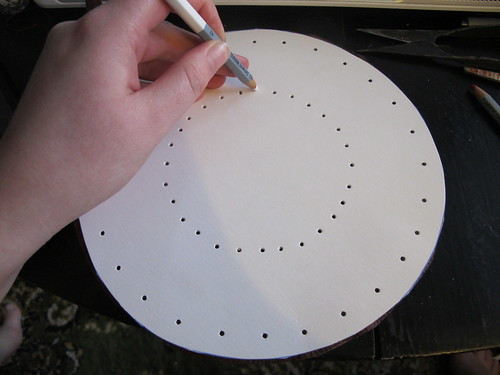
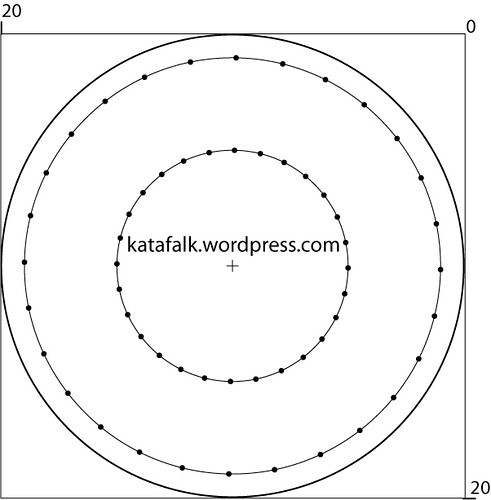
- Marking and Punching Holes: Create a paper template to ensure even hole placement. Punch holes in your paper guide and use this to transfer markings onto the leather circle. A slightly wet regular drawing pencil works well for marking leather. These markings will indicate where to punch holes around the circumference of the leather circle.
 Marking holes on leather for Norwegian money pouch
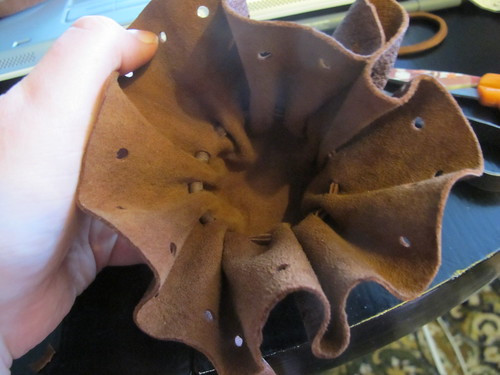
- Punching the Holes: Carefully punch out the holes at each marked point around the leather circle. These holes are for threading the leather strips that will close and shape the pouch.
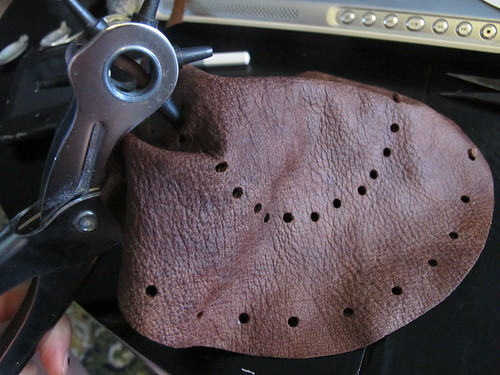 Punching holes in leather for Norwegian money pouch
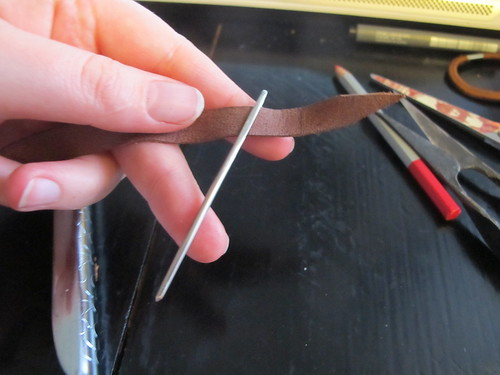
- Preparing the Leather Strip: Take the longer leather strip (approximately 65 cm) and taper one end to a point. This pointed end will make it easier to thread through the punched holes.
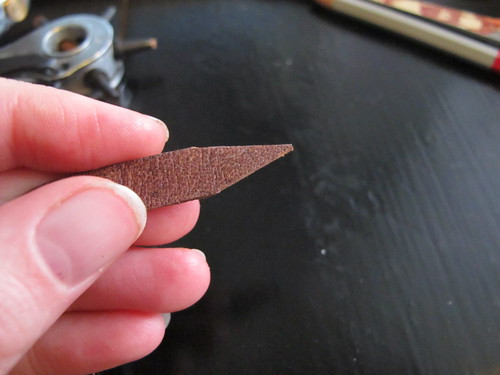 Pointed leather strip for Norwegian money pouch
- Threading the First Strip: Begin threading the pointed end of the longer leather strip through the holes around the leather circle.
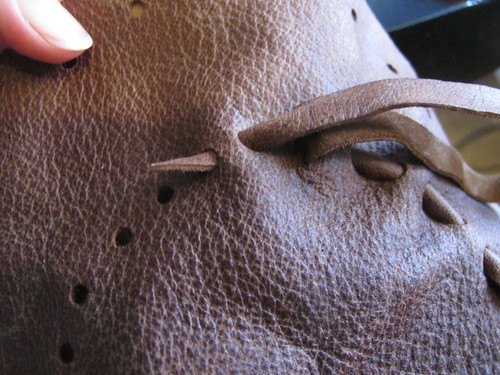 Threading leather strip through holes of Norwegian money pouch
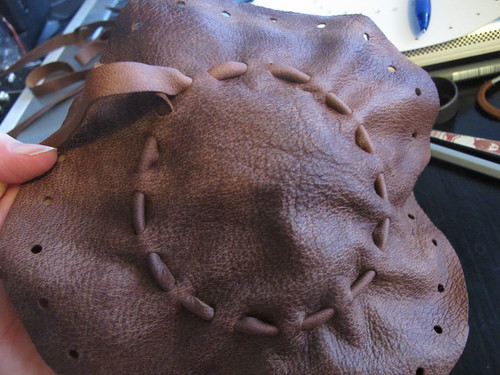
- Securing the Strip: Continue threading the strip all the way around the circle, pulling it through each hole.
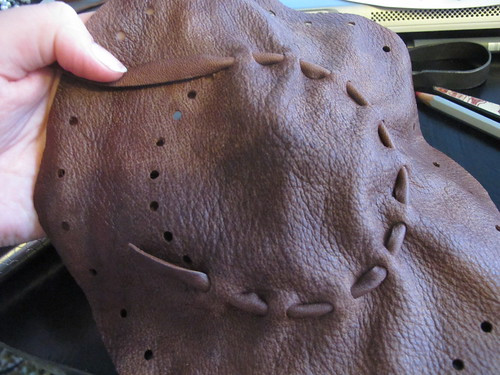 Threading leather strip around Norwegian money pouch
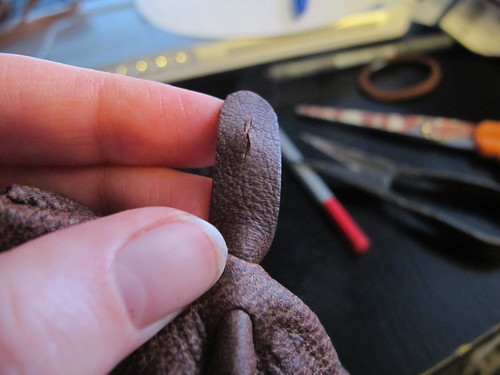
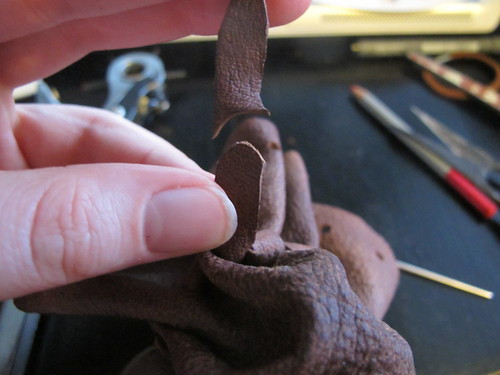
- Creating the Closure: Round the other end of the longer leather strip and cut a small hole in the center of this rounded end.
 Creating hole for closure of Norwegian money pouch
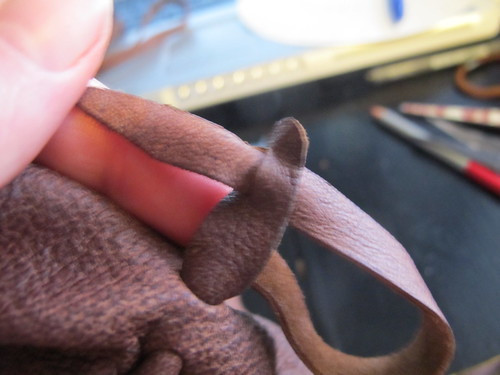
- Forming the Pouch Shape: Guide the pointed end of the leather strip through the hole you just made in the other end.
 Forming pouch shape of Norwegian money pouch
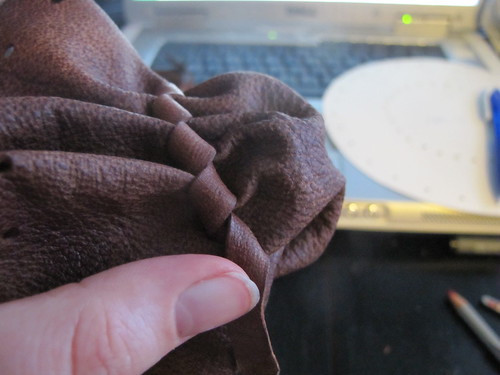
- Adjusting the Opening: Gently pull the leather strips to gather the pouch and adjust the size of the opening to your preference. This will determine how open or closed your Norwegian money pouch will be when finished.
 Adjusting opening of Norwegian money pouch
-
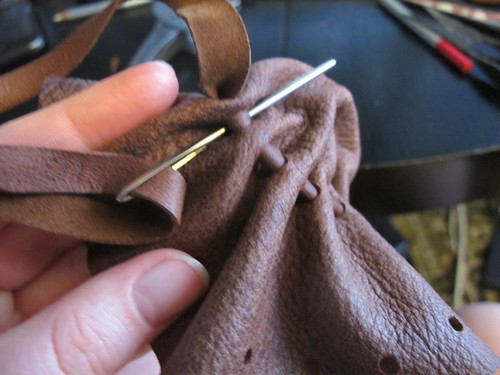
Wrapping the Strip: Thread the pointed end of the longer strip onto a large, blunt needle. Now, begin wrapping the leather strip around the gathered top of the pouch.
-
Continuing to Wrap: Continue wrapping the leather strip around the pouch, ensuring it lies neatly and evenly, covering the first round of the strip. This wrapping adds reinforcement and a decorative element to your Norwegian money pouch.
 Continuing wrapping of leather strip on Norwegian money pouch
- Securing the Wrap: Once you have wrapped around the pouch to your desired thickness, if your strip is too short, you can join another piece ensuring the joint is at the “backside” for a seamless look. After wrapping, guide the needle and the end of the strip down through the hole created at the beginning of the wrap.
 Securing wrapped leather strip of Norwegian money pouch
- Finishing the First Strip: You will now have the remaining strip end on the inside of the pouch. Cut off any excess strip, and split the end in half. Thread one of these split ends onto the needle and pass it under the inside strip to create a knot. Securely knot the ends together and trim any remaining leather.
 Finishing first leather strip of Norwegian money pouch
- Adding the Second Strip: Take the shorter leather strip (approximately 50 cm), point one end, and thread it through the top holes of the pouch, in the opposite direction from the first strip.
 Adding second leather strip to Norwegian money pouch
- Securing the Second Strip: Thread this second strip all the way around the top of the pouch and knot the ends together to create the final drawstring closure for your Norwegian money pouch.
 Securing second leather strip on Norwegian money pouch
Your Norwegian Money Pouch is Complete!
 Finished Norwegian money pouch
Congratulations! You have now crafted your own Norwegian money pouch, a functional piece of history that echoes centuries of practical money management. This pouch is not only a unique accessory but also a conversation starter, connecting you to the rich cultural heritage of Norway and the ingenuity of historical craftsmanship. Enjoy using your handcrafted pouch, and perhaps consider the journey of Norwegian money through history each time you use it.